Tuesday, 2 February 2016

Scrapabilly February kit shares (part 1)

February marks the 100th kitiversary of the monthly Scrapabilly kit which I've been lucky enough to create with for the last 2 1/2 years! 

To mark this momentous occasion, Sylvia has shaken things up and now there is not one but THREE kits available each month to choose from - if you can!

There will be a "Kit des Monats" which is a little smaller than previous monthly kits - no cardstock and a couple less sheets of paper but still the same amount of alphas, extras and inspiration! Then there will be the "SchnickSchnackSack" which is an embellishment kit! And last but not least, the planners out there will be delighted to hear that there will also be a "PrettyPlannerPack"!

This month's debut kits can be seen below and they are ALL gorgeous - I already have my name down for a SchnickSchnackSack (how could I resist!) and am looking forward to all the inspiration the planner girls will give me in anticipation of a planner later in the year.

Find the Kit des Monats here

Find the PrettyPlannerPack here

Find the SchnickSchnackSack here


The monthly kit features Photo Play "Like A Girl" papers and coordinating stickers. There's a pack of one of my favourite Thickers fonts, a sheet of Memorandum washi tape by Pink Paislee, tags, enamel pearls and an exclusive Scrapabilly Schriftbild flair button. Oh man! I love it.

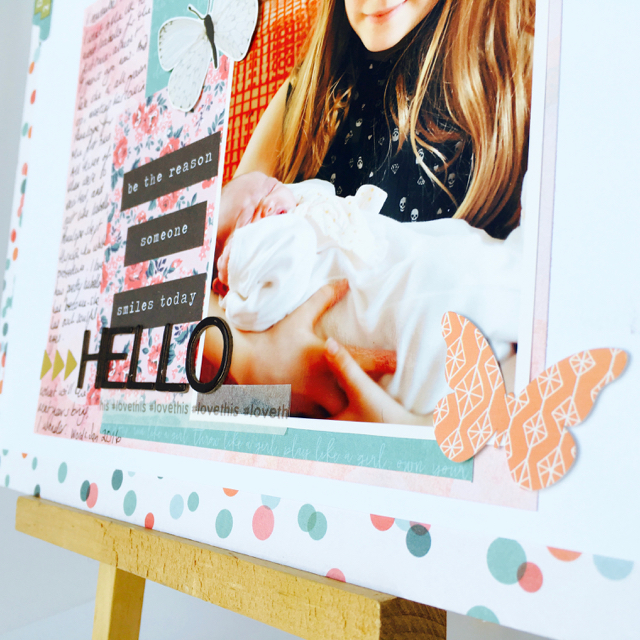
So here are my first two layouts. I tried, ever so hard, not to really go down the feminine, little girl route but the papers were just too gorgeous not to. So my nieces figure quite prominently. But with such wonderfully, pretty girls how could I have resisted? 

This first one is a photo my youngest sister sent me of her two girls. It reminded me of when my own sister was brand new and I was just 7 years old - and of all the love I felt for her. I captured a few thoughts on this topic and felt that the pocket page cards and stickers were the perfect accessories for this.


It was hard to choose a-side or b-side papers sometimes so I often used both! I love the splash of black this chevron offered to the photo layer.


There were so many stickers to choose from on the sheet - they seemed to work well together or as a stand alone.
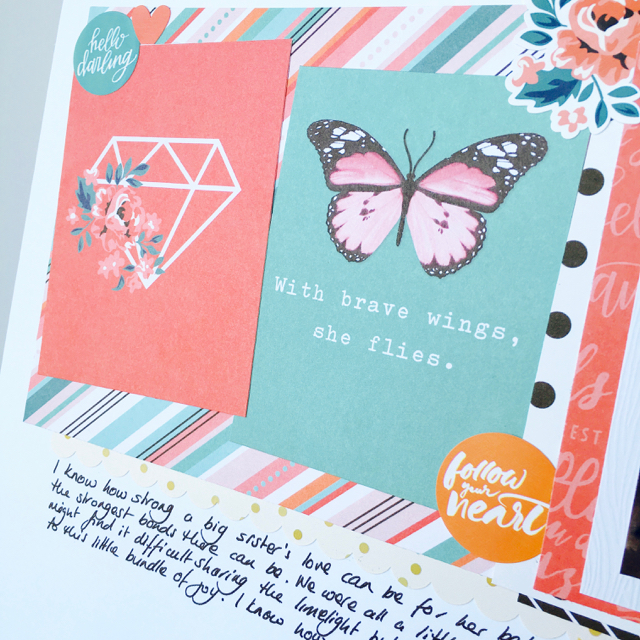

That "#love this" is a little strip of washi that I loved using. There were so many options to just add a little something here and there - my kind of embellishing.


And here's one of my other nieces with her brand new cousin. We were all so excited to meet her and she was no exception! I love that calm look on her face and those deep soulful eyes - again!

I couldn't resist doing what I consider to be "a Shimelle" and making a spotty border round my white cardstock. Of course, I stole the middle so that I could maximise the amount of the lovely confetti paper I could use.


I added a few tiny gold letters for the date - you can find them in the Scrapabilly shop here.


I'll be back later in the week with a couple more layouts to share but in the meantime, you can go over to Scrapabilly's gallery (here) and see what the whole 16 person team created with these fabulous new kits. It's inspiration overload over there!

And don't forget to check out the kits here.

Monday, 1 February 2016

Counterfeit Kit Challenge February kit reveal blog hop

The 1st of the month can only mean one thing - the Counterfeit Kit Challenge kit reveal blog hop.

Hopefully, you've reached me by way of Leslie with her amazing Blue Box of goodies but if not, don't miss out on the fun. Head back to the Counterfeit Kit Challenge blog to start at the beginning!

This month we were given a fabulous kit to counterfeit by a relatively new UK-based kit club, Mind the Scrap, run by speed-scrapper extraordinaire, Emma! She's been a counterfeiter for some time now and we were thrilled to be allowed to use her current kit for inspiration! Here's the collection of supplies you can find in the Mind the Scrap February kit. And it's great that we've been given the chance to make our own take on this as it's already sold out! I'm not surprised - it's gorgeous!

Mind the Scrap can be found here

Now, once again, I didn't have any of the original products in the kit, so I decided to get creative with my interpretation and it ended up like this!


I know, I know - sometimes I wonder how on earth my kits come out as they do because on first glance, there's not much to match the original. But let me explain my thought process.

Don't forget that I've set myself some "rules" for making my kits - at least for the first few months of the year. You can see the list at the end of my reveal post for the January kit. So I printed that off and then did what several of the girls on the team do and write down some notes about the papers, the colours, the patterns and anything else that springs to mind when I see the individual items in the original kit. This included: triangles, ombré, hearts, loopy words, arrows, rub-ons, brush scrip alpha, pink, green, creamy and Crate Paper.

First off, I picked out the papers, matching some of the colours I saw, the wordy element and the triangle geometrics. I added in some old BasicGrey (sob, sob) from one of my favourite collections, Sultry, because I thought the colours were not dissimilar to the original. Limiting myself to five papers plus one just because (something I have to admit to lifting from the delightful Susan), I came up with this:


There's a geometric from MME's On Trend 2, two sheets from Maggie Holmes Syleboard, two sheets from BasicGrey's Sultry and a gold foiled vellum from Dear Lizzy.


I love how the stars are both full and outline!

Then I continued with my guidelines and filled my kit with embellishments. I have included several pieces of older chipboard and die cuts and a handful of pocket page cards in colours to go with the main papers and featuring Crate Paper, arrows, hearts and words.


A little bag of mixed sequins and bits that usually sits in my table top tote - to remind me to mix it up and use them.


Heart punches to fulfil my tool guideline and also match the hearts featured in the original.


More older die-cuts in colours which seemed to match and some alphas including the white version of the original black brush stroke font. There are also a handful of really old rub-ons. To be honest, I really find them hard to use but lets's see. They might be a use them or lose them product this month.


I know that the original kit has those stunning dimensional arrows and the über-cute fringed hearts  - which are just represented by arrows and hearts in my kit - and you never know, I might give them a go for some forgeries. Right now, I'm happy with my alternatives but they DO look perfect for forging, don't they?!?

So there you have it. A small - for me - kit and still following my self-imposed rules! Totally different from the gorgeous original inspiration kit by Mind the Scrap but very much my kind of selection of product. And that's what it's all about, isn't it?

Thanks for dropping by today. The ever wonderful Lynnette is next up and we all missed her incredible staging last month, so I'm happy she's back :-)

Saturday, 30 January 2016

10 years!

14th January 2006 was a very significant in the history of Lisa. This was the day (although it might have been a day or two either side of this!) when I stepped inside my first scrapbook shop on a visit home to the UK and caught a glimpse of my very first piece of BasicGrey paper. And I was lost. Forever.

It was at that moment that I knew I had discovered something that I would love and that I had been looking for for a long time without even knowing it!

I'd been reading about this thing called "scrapbooking" online for some time. I think first through Flylady and then just generally as I looked into it and tried to work out what it really "was". It took me about 6 months before I felt confident that I understood the concept enough to talk to my sister about it and her interest was piqued. So when I found a shop that stocked scrapbooking product - whatever that might be - near to Birmingham, I persuaded her to come along with me to check it out. We both nearly gasped when we saw the papers and embellishments. And I'm talking about a shop which had a teeny tiny selection of product! But we were in awe! Such pretty bits and pieces to cut up and use to decorate our photos. Sounded like fun. So I bought a few a lot of items and took them home with me. I had been in England that weekend for my nephew's third birthday and knew that these photos would be ideal for my very first scrapbook page.

I suspect that it took me some time to pluck up the courage and convince myself that I had everything I needed to jump right in and looking at the page, I think that these products are not the items I bought at that first shop. I probably convinced myself that I "needed" an eyelet setter and eyelets - remember how popular they were, back in the time?!? - and the papers and stickers were from a DCWV paper pack - no BasicGrey to be seen here for sure! And I remember ordering some books to tell me how to do it right! But sometime in January would have been that first paper cut...

So, do you want to see that first page?


A double page spread featuring various random, unconnected elements and a bit of a sticker sneeze. Badly printed photos and even themed Barney elements from the party invitation and bits I picked up while I was there - the journalling tucked away was probably something I'd seen in one of the books as was the matting and double matting! I remember being short of title elements/letters and being proud of my computer title work. It all looks so amateur to me now but I'm still so proud of it!

Later on, in the first six months or so of scrapping, there would be layouts made which have not stood the test of time as much as this one due to really awful design and execution - most likely in the bin by now. But even though there's a lot of amateur mistakes on this one, it's really not sooooo awful!


Just for fun, here is that awesome little boy right now! He's 13 and all grown up. And I still love making pages about him and he must get a lot of credit for putting up with his old Aunty Lisa needing hugs and photos.


And this is my most recent layout about him - the ten years have brought a lot to my scrapping, the design style I have, the relationship I have with my family and life in general. Mostly for the good I hope!


Now that I have my layouts in albums, I was easily able to identify and pull out two further layouts from those early weeks - how I love that! I'm not sure exactly when they were made but I'm guessing that they really were right at the very beginning. Maybe even the first handful of layouts.

I still adore Blitzen by BasicGrey and was so happy to make up this page using a sketch (new for me!) I found on the BG website. I remember spending so long on this getting the papers exactly as the sketch suggested and the overlap of the photos just so. And there's story there too. I recall my husband looking at this when I first made it and asking why I had made it - what about the big story stuff. And I told him that these were the memories that were precious to me. Soon after this, I discovered the world of scrap celebs such as Stacey J, Shimelle and Ali E and I knew that this was my home. Capturing the details of life that I wanted to remember as well as some of the more important events...


...such as my sister's wedding. We used to challenge each other back then and this was in response to me saying we should make a page about the other one. Look! There's a sheet of the very first scrap stuff I picked up back in that very first shop we went to, and fibres and rub-ons! And hidden journalling, and the metal charms that were so "in" back then. This page is so dated but I really really love it. Still!


The intervening 10 years and probably way more than 1,000 layouts have brought about a lot of changes to me, my life and of course, my scrap style. Scrapbooking has improved my life in so many ways including the wonderful friendships I've made with creative peeps around the world - both online and in real life. Real, deep, meaningful relationships that make my life happier. I can't imagine not scrapbooking even if I don't make as many pages as I did in the past.

And I'm still scrapping the little memories as well as the big events. And I'm still using and loving BasicGrey papers - even though I'm sad that their time in the paper crafting business appears to be over :-(

Long long long story short, I also wanted to share my most recent page with you today which uses my Counterfeit Kit Challenge January kit, Rekindle and features elements of BasicGrey Infuse papers in what I like to think is a perfectly up-to-date, stylish way.

A big event recorded - a new baby in the family - which calls for an über-pretty page which mixes up old and new. Both papers and embellishments. Infuse papers were from 2007 and the DIY shop collection was new to me in November. 2015. There's brand new gold glitter washi alongside the vintage price tag which was included in a Bellboo kit way back in 2008. This is one of my creative goals for this year - loving and using the stash I have and bringing it together on pages which make me happy!


What are your creative goals this year? With January almost over, it's time to make sure our goals really do match what we can achieve. This layout has proved to me that I'm on the right way.

Friday, 29 January 2016

Simple Scrapper January 2016 #2

Here is the second of my contributions for the Simple Scrapper Creative Team in January using a sketch (#281 from the Simple Scrapper membership community here) and a November story starter from 2011. 


The original sketch was a double page spread with 7 photos 2.5x4". I cut out the middle three photos which brought it down to a single page and made the photos 2x2 so that I could fit double the amount of prints into the same space. The story starter was "When November tools around, it's time to..." which was perfect for a round up layout covering all the highlights of my birthday month.


I used my Counterfeit Kit Challenge November kit "Remembrance" and picked out soft tones to add a neutral backdrop to my busier pictures.


I could imagine making more layouts like this to summarise a whole month - a sort of Project Life without the pockets!


Adding some stitching, mist, silver thread and staples provided some extra detail and texture to what appears to be a relatively simple layout.

I love it!


To find out more about the resources available to inspire you to create beautiful pages and tell meaningful stories in a supportive, communicative community environment environment, check out the Simple Scrapper premium membership go here.

Wednesday, 27 January 2016

Wednesday Wonderland - the return!

I missed the Jingle Belles girls so much last year! I allowed myself to get caught up with other things and stopped having my weekly Christmas card fix which meant less inspiration for me :-( and a far too small pile of holiday cards come December :-( :-(

So, I'm going to try harder. Let's see how that works.

Last week, I got into the swing of things by running up some easy cards and then on Thursday, moved onto the first (for me) Jingle Belles prompt of the year:


I picked up a sweet pack of reduced die cuts from Pinkfresh Studio (from Scrapabilly here) and quickly made these two quick and simple cards


A little white on white embossing using one of my favourite embossing folders ever with a 3D geometric pattern (might have to get my own), a little silver twine, a frame, a tree and a word strip. Edge the whole think with some silver pen lines and finished. Ah, that feels good. 6 cards ready to go when Christmas comes around all too soon again :-)


I'm delighted to be back - hoping I'm not speaking too soon - playing along with Jingle Belles. That mad dash panic to get cards finished off at the end of the year was too much for this girl.

Why not join me for a little Christmas card making fun without all the pressure!

LinkWithin

Related Posts Plugin for WordPress, Blogger...