Tuesday, 8 November 2016

November at Scrapabilly #1


November's Scrapabilly Kit des Monats features Jen Hadfield for Pebbles, Warm & Cozy collection. Gorgeous! The papers include a stunning rose-gold foiled leaf outline on white design along with lots of neutrals and a cut apart sheet. The die-cut pack was full of gorgeous elements again featuring the rose-gold foil and the chunky set of rose-gold Thickers made my happiness complete. There was also a sheet of washi paper strips.


There were a lot of elements which seemed to inspire home and autumn themed pages but I also used my supplies for some other subjects which shows how flexible the kit proved to be.

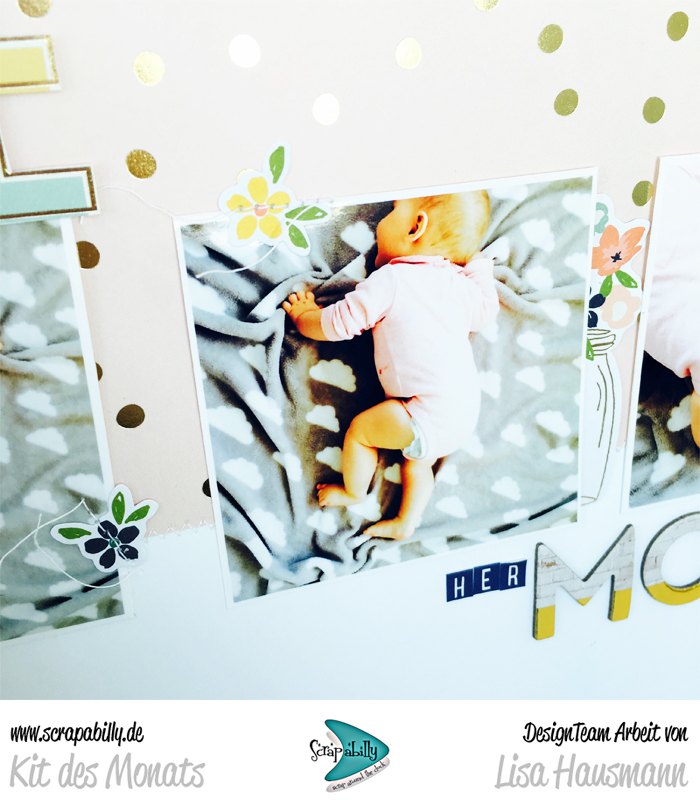
I added in some mini alphas by Jellybean Soup at the Scrapabilly shop here. Mini alphas help me with my longer titles and I love the versatility of the large and small together.

Other than that, I limited my extra supplies to lots of inks, lashings of fine gold thread, a couple of gold doilies and a handful of mini embellishments such as tiny veneer stars, some chunky gold glitter and a sprinkle of woodgrain enamel dots. Similar supplies can be found in the Scrapabilly shop herehere, here, here and here!

First up then is a page I thought would be perfect with all those rose-gold elements - about my rose gold iPhone and how lucky I am to have it. I'd taken the photos over a year ago with the plan to make the layout sometime but hadn't got around to it.


I stitched myself a grid across the page so that I could decorate each little section with something a little different. I had to do the journalling more than once ;-) but in the end, took the b-side of a pocket page card and got it written up correctly.


I'm very into mini pockets full of tiny items at the moment, in case you hadn't noticed! I filled this one with tiny punched hearts as well as some larger ones, a handful of mini veneer stars and some chucky glitter.


The "thankful" die cut was all I needed for a title and I used some foam dots for dimension with some scrunched up gold thread behind.


Of course, gold and pink mist was called for to really reinforce the colour scheme I had created.


Next up is a page about how I finally got nearly 10 years of layouts into albums. Another story that's been waiting a long time to be told.


I started scrapping in 2006 and had the usual post-bound standard albums to begin with. But my output soon outgrew those first few and I continued to just store them in plastic boxes. Hundreds and hundreds. Waiting for a concept. I toyed with the Stacy Julian Library of Memories scheme but it didn't quite sit. Then my husband and I came up with a plan about how he/we would best like to look at the layouts in years to come (we never look at the layouts now so I'm curious when that will be!) and decided on yearly albums for when the layout is set regardless of when they were made, as well as a few single albums such as the Yukon, NYC, the Philippines and maybe even our travels around Germany.

All that was left was to settle on a range of albums. The WRMK gold and platinum albums are the ones and I bulk bought them for the time when I sat down to sort through the piles of layouts to make some sort of sense to them. Last May was that time and now I have 32 albums on my shelves - full! There's still a huge pile of more recently made layouts to file away, but it's a start. There's a lot more work to be done but this first, hugely important step needed its own layout.


Here you can see the original boxes of layouts and my initial sorting. It took me days.


And this coral coloured album was the first I put together featuring layouts from my time in the Philippines.

In the photo at the far right here, you can see many full albums ready to be labelled and gone through once more to ensure that all the layouts in there are complete and worthy of a precious space!


Thanks for dropping by today.

Check out the kit here on the Scrapabilly site and don't forget to check out the Design Team gallery here while you're there. I love looking at the gallery to see all the different ideas we've come up with. You can also find the Schnick Schnack Sack (embellishments) and the Pretty Planner Pack kits and galleries there too. So much to discover and so much inspiration to be had.


Back soon with more shares.

Friday, 4 November 2016

Forgeries on the Fourth


I explained in my Counterfeit Kit Challenge reveal post that I based almost all of my November kit, Foxy, around the concept of foxes which I could see on a tag in the original kit so I asked if I could borrow this super sweet die from a scrappy friend to make up a few foxy embellishments too.


Originally one crop evening, we'd all made ourselves cute foxes in orange and white cardstock but I wanted to give it a go with some of the Cedar Lane scraps I included in my kit.

These were the papers I thought I'd try.


I have to admit that I'm not much of a paper-piecer and lack the patience that several of my lovely crop friends have (they sit there making things like this all evening!). I tend to get glue everywhere, things are crooked or dirty and I just sort of give up! So I limited myself to just five figures.

I cut and made up one to make sure that I knew what I was doing and that it would work with the papers I'd picked out, and then batch cut another four sets.


Et voilĂ ! Five adorable little figures that were worth all the effort and glue! I fell in love with them right away and knew that they were perfect for my kit concept.


Love them!


The original kit had a tag with a fox printed on it and as this was the first thing that had caught my eye, I decided to just combine one of my foxes, a tag and a couple of stickers from the Shimelle booklet to make my own version.


Next up, the ribbon in the Cocoa Daisy kit grabbed my attention and I realised that this was too easy a counterfeit to pass up! I don't have many stamps nor do I have much stamping ability but I applied some mini designs onto a cream length of twill ribbon. I used a dark brown and a black just to give me a few inches of each design. I don't use much ribbon these days but I've already added a little to a tag on a layout that I'm trying to finish off. I'll share that soon.


As ever, easy easy easy. The ribbon took just a few minutes and the foxes took me longer than they needed to because I took my time to make sure I didn't make a mistake.

Why not make up your own counterfeit items for your kit?

On the Counterfeit Kit Challenge blog you can find some links for some autumnal printables so check those out too - they look perfect for any November kit.

Don't forget that we love it when you join in and make up your own kits. Share your kit and your creations over at our Link-Up page and don't forget the Member Blog Hop on the 24th. 

***** MEMBER BLOG HOP ***** 


Find out how below!  
Go on, you know you want to! 
Your project should be something new, using a Counterfeit Kit Challenge kit, that you haven't shown before and will only post for the hop. Be inspired by any of the challenges this month or just share something you've created with your kit. Remember, the more the merrier and it never fails to be a lot of fun! 
To be a part of our blog hop: 

  • E-mail us your name & blog address & promise to participate at thecounterfeitkitchallengeblog@gmail.com by the 18th November.
  • You will receive an e-mail from us by the 20th November with a list of the hop participants.
  • You will need to schedule your own blog post showing your project based on a challenge and link to the person after you in the hop.All Blog Hop posts will need to be scheduled to go live on the 24th November at 12:00am Mountain Standard Time (Arizona) but we will help you with the scheduling

Tuesday, 1 November 2016

Counterfeit Kit Challenge November kit reveal blog hop

I'm thrilled that it's November. It's my favourite month of the year full of birthdays, celebrations, visits and friends not to mention the end of autumn which you all know that I adore. I've recorded my love of November before in case you think I've lost my mind loving this month that almost everyone else thinks of so negatively! It's all about positive thinking. You can find a layout where I recorded my change of attitude here.

But you're not here for that - hopefully you're here for the Counterfeit Kit Challenge November kit reveal and I'm happy to be here right at the beginning of the hop directly after our lovely Guest Designer, ex-MF Dawn. We are so happy to have her joining us this month and I'm excited to see what she has in store for us.

Next up is my sweet friend, Lynnette, who I know will delight you as she does me.

Master Forger Kelly picked our gorgeous autumnal kit this month courtesy of Cocoa Daisy. Their October kit, "City Park" is perfect for my love of this time of the year and I was really happy to pull my rather large kit together.

Here's the original Cocoa Daisy kit


And here's my take on it - Foxy.


The first thing I noticed was that I had some of the same items in my stash - the Shimelle collection was something I just had to have. But, to be honest, that's not where I started. The cute fox on that tag at the bottom caught my attention and I decided the this was the time to use my  autumnal Photo Play papers that I got last year which feature super cute foxes...


This drove the rest of my kit and even my main forgery embellishment.

Let's have a look at the papers. I picked out the Shimelle papers which I had and then added in some papers which reminded me of the designs of the other papers - trees, woodgrain, map, cute small pattern.


And starting with the Shimelle sticker booklet, I then built up the rest of my embellishments. Lots of washi tape in an effort just to use some up and also because one or two of these are new and I love them.


There are LOADS of alphabets in the hope of using up some of these almost completed sets. I've also included a whole batch of suitable stickers that need using up.


There are some enamel dots, some flairs and a length of twill as well as some labels which match up with the original.


And then, just because my eye fell on these left-overs, I added in all the bits and pieces I have from the Pink Paislee Cedar Lane collection that I totally adore and would be good to use up.


This is a big kit but I really think I'm going to enjoy using it. I will probably need some more embellishments along the way but it's a great start!

Well, that's it! The last Counterfeit Kit Challenge kit of the year. Next month is traditionally without a full kit but we have lots planned for you so you won't be deprived of your inspirational kick! But in the meantime, let's really enjoy this wonderful November!

Thanks for dropping by today and here's the full hop list in case you get lost along the way.

Sunday, 30 October 2016

October at Simple Scrapper #1


October at Simple Scrapper saw me combining two of the month's sketches to have a go at a double spread - something I rarely do these days. It was a lot of fun to work out how to make it look like a cohesive design and flow nicely across the full 24".


I tweaked both sketches to accommodate my design. This sketch indicated embellishments under the photo so I just swapped it out for my main journalling and a sub-title. The card on the left of the photo replaced out a journalling tag.

Sketch #326 from the October 2016 collection and Story Starter #1 - "On the Table" from November 2015

And on this side, I skipped the journalling under the title and went for some simple text directly on the photo to indicate the food that we enjoyed. However, both sides are still relatively true to the original designs of both sketches and prove that you can combine two to make a full spread very easily.

ketch #323 from the October 2016 collection and Story Starter #1 - "On the Table" from November 2015

To ensure flow and cohesiveness across both the pages, I used tones of red, white and blue which match the theme of the page but not the true tones that you can find in the photos. Additionally, I used one collection of paper and embellishments, (Jen Hadfield, DIY Home) ensuring that elements of all colours, designs and patterns appeared on both sides. This was so much fun and reminded me just how great it is to make spreads where you get so much space for all the typical elements on a page - photos, journalling and pretty stuff.


The Story Starter "On the Table" really focussed me to concentrate on the real story of this very British afternoon tea. The bringing together of family - across language and culture which is a very important part of my life.


I wanted a title that supported the subject of the page without being too obvious. And the gold won out even though I use this alphabet so sparingly! I can't bear the thought of it running out - good job I bought three sets.


To find out more about the many resources and inspiration - including the sketches and story starters I use each month - available to inspire you to create beautiful pages and tell meaningful stories in a supportive, communicative community environment, check out the Simple Scrapper premium membership here.

October at Simple Scrapper #2


I was thrilled to see that this second Creative Team layout for Simple Scrapper in October made the front cover of the membership magazine Spark. This is an amazing team to be part of and the talent of the other ladies is just so impressive that I feel honoured to be highlighted in this way. And this is a particular favourite layout of mine so that made me doubly happy.

I combined an older sketch with this month's Story Starter, "Tending the Nest" to talk about my mum and my 94-year old granny.

Sketch #300 from May 2016 and Story Starter "Tending the Nest" #7 from October 2016

I also used my September Counterfeit Kit Challenge kit, Sundance and found that the softer tones of the kit matched my photo so perfectly. I wanted to ensure that the whole layout felt soft, caring and feminine.

Counterfeit Kit Challenge September kit, Sundance lo#2

I used my favourite way of keeping the journalling a little private - a vellum pocket. You can see it's there and if you are close enough to me to feel comfortable to pull out the card to read it, it's relatively easily accessible.


The original sketch was designed for an 8 1/2 x 11" page with four 2x2 photos so I just stretched everything a bit bigger to fill my 12x12 page and made my single photo 5x5.


I loved how the blue and aqua elements in my kit matched my granny's cardigan so perfectly. I don't often try to match up my design with the photos featured, just using what I have in each kit in a way that pleases me, but this worked out so perfectly.


To find out more about the many resources and inspiration - including the sketches and story starters I use each month - available to inspire you to create beautiful pages and tell meaningful stories in a supportive, communicative community environment, check out the Simple Scrapper premium membership here.

Thursday, 27 October 2016

October at Scrapabilly #3

Back again with my last shares using the Scrapbilly October Kit des Monats which is full of Simple Stories Posh collection papers and embellishments.

Here's a reminder of the beautiful kit and you can find my first two blog posts here and here.


My last two layouts feature the two youngest members of our family - baby J and pretty P - both of whom are simply gorgeous and I'm so proud to be their auntie. It's always a good excuse to make a pretty baby page!

First up, baby J when I first got to meet him. From the photos I've seen over the last week or two, he's grown quite a bit since then but boy, is he cute!


There was some serious letter tweaking to complete one or two of the titles this month. The bird's tail here covers up some "clever" piecing!


And finally, but by no means least, is a page about sweet P. As usual, I grabbed some screen shots off IG and decided to use all three at once. Somehow, I love that you can't see her face even more and you can almost feel the effort she's going through to get moving!


I cut this from one of the pocket page cards. I think it works perfectly as part of the title.


This page was a good excuse to get happy with all the pink and girlie elements in the kit and to just make it all pretty. That spotty paper was just too delicious not to use as a large piece.


Another great month using these wonderful papers and elements. Thanks to Sylvia for making up such a gorgeous kit. 

Check out the kit here on the Scrapabilly site and don't forget to check out the Design Team gallery here while you're there. I love looking at the gallery to see all the different ideas we've come up with. You can also find the Schnick Schnack Sack (embellishments) and the Pretty Planner Pack kits and galleries there too. So much to discover and so much inspiration to be had. You might be lucky and be able to pick up a kit of your own too. Head over and see :-)


Back soon with more October shares this time from Simple Scrapper - determined to get them all shared within the month!

LinkWithin

Related Posts Plugin for WordPress, Blogger...