Monday 6 March 2017

Counterfeit Kit Challenge mini-kit and project reveal

I'm pretty excited because this is the first month that I'm on "mini-kit duty" over at the Counterfeit Kit Challenge! We changed things up last month so that half the team make up a full kit along with the scheduled challenges on the blog and the other half make up some sort of a mini-kit and project based on the same inspiration kit.

You will no doubt know all about the original kit by now but just to remind you, here it is:

February Hip Kit Club main kit

You probably know that I make up pretty large kits most of the time so I knew this was going to take a mind shift for me. I mean look at all that scrummy stuff in the kit! I could easily have made up a HUGE regular kit.

So I kept in mind the main kit and then looked at the other items available - a lovely embellishment kit, a varied pocket page kit and a cardstock pack which picks up the main colours.

I know it's going to sound strange but I decided to just go with this cardstock pack and concentrate on getting the right colours for what I was going to pick out. But what sort of a kit should I make? A page kit, a card kit, a mini book or.... how about actually starting my Project Life album that I've been talking about for about 6 years! Every year I say that I'm going to do it and maybe this was the time to really stop talking about it and actually make a spread.

A pocket page kit it would be, then. Based on these colours:

 February Hip Kit Club cardstock kit

I'm thrilled to present Finally! My very first pocket page kit. And yes, I even made up a spread which I'll share later in this rather LONG post!


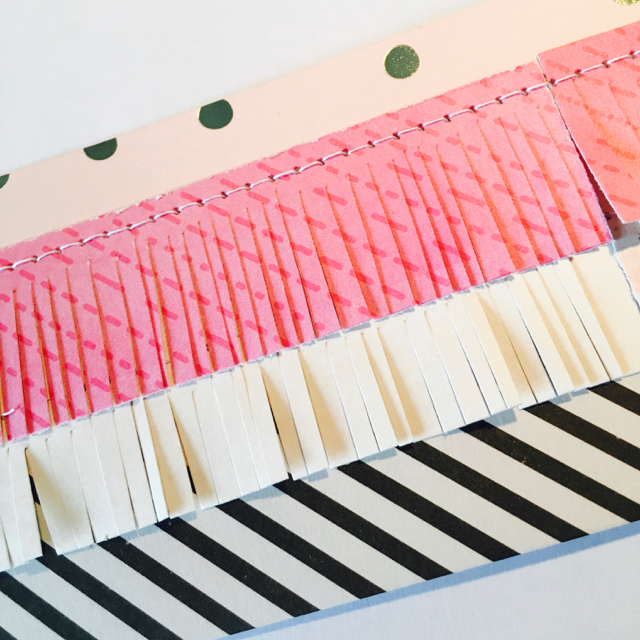
The kit started with the "Blah blah" Studio Calico card there in the middle as well as the hearts in a circle next to it. From there I built out with 6x4", 3x4" and a couple of square cards in the limited colours of the cardstock kit. I realised I'd need a bit of paper too so threw in those four sheets along the top.


And then I added in some of the Pinkfresh items I have from the Felicity and Noted collections - epoxy stickers, sequins and die cuts.


A handful of alphabets which I might need.


And some Simple Stories enamel dots.


It was really hard to limit my selections to just paper and flat embellishment type elements but I'm happy with the kit I've come up with. I knew that there would be too many of some items and too few of others but as this is the first time I've made this kind of kit, I allowed myself some flack. At this point, I had no idea of how I'd actually pull my PL spread together.

Now the following photos are really awful as it's totally last minute here, I've missed the light because these pages took me AGES - so the quality is terrible, sorry! I'm going to have to speed up as I thought the whole point of pocket pages was that they take minutes to put together!

Once I had my kit picked out, I looked through one month's photos and decided that I didn't want to limit myself to one spread per week or even per month but to leave it flexible. Then I didn't want to only have portrait or landscape photos and would like to include square shots too. Some important decisions. And I decided that I would go back to January - seemed manageable - and see if I could catch up with just this year as a start.

That meant that I was going to need to mix up the pocket pages - I've used Design A and D here - and looking at how many photos I wanted to include, it seemed that I needed two spreads for the month. That seems reasonable across a year - will they fit in one album?

Anyway, then I printed out my photos to see what I had and then worked out how to spread them across the pages. I made a title card and mixed in journalling and decorative cards for interest. To be honest, I made a lot of mistakes in this first month that I hope to learn from as I go on but I can't tell you how happy I am to have made a tiny step. And I even remembered to track down a couple of memorabilia items - go me!


What do I like about these pages?
  • that they are done :-)
  • that some of the photos are favourites but would have never made it to whole pages
  • that I have some details down that are nice to remember
  • that I used a few items of memorabilia
  • that I used up some of my huge collection of pocket page cards
What do I dislike about these pages?
  • that they took me forever
  • that they don't look very cohesive
  • that it was difficult to decide what journalling to add
  • that I felt the need to decorate a lot which took a long time 
  • that I got some of the quantities wrong and ended up tracking down a few extra cards to add to the kit
Things to ponder for next month. I already have the title page and a journalling card (remember my challenge entry for CKC last month?) so maybe I'll try and get that month done as soon as possible and use the rest of my February kit for that too.

Let me know if you have any top tips for me to solve some of my dilemmas!

Don't forget that there's more ways than ever to join in the fun over at the Counterfeit Kit Challenge
SaveSave

Saturday 4 March 2017

Forgeries on the Fourth

Welcome to the March Counterfeit Kit Challenge Forgeries on the Fourth.


I'm trying to be a more creative with my kits this year and part of that is getting back into a bit more counterfeiting. Once I've got an idea in my head and get to work trying to make that a reality, it's a lot of fun and even the fails make me smile. I love seeing how I can improve my creations though changing the process in small ways! 

And this one was no different. 

I looked at the original inspiration kit and decided that the oversized fringed Maggie Holmes butterflies might be a possibility to forge and looked up some more detailed shots online so I could get an idea of how they were constructed. It was a little difficult to see exactly how each stripe of patterned paper was attached and the dimensions so I just gave it a go and came up with a very rough first version. In fact, it was so rough that I didn't even get the sewing machine out and just grabbed my tiny attacher. Definitely a first draft...


Lots of room for improvement there. I looked at the originals again and decided to make more than one line of fringing. And the sewing machine was dragged out. Now this one was almost even more of a failure as the stitching was way way way too small and it almost worked like a cut line and the top of the wing even fell off! I taped it back on! You can see here that the middle section of fringing falls off due to the shape of the butterfly so in the end, I adhered some strips back in the middle and you can see the (bit) better iteration in the photo at the end of the post where I show you all 6 butterflies that I made.


Ok, learning from a lot of mistakes, I decided to give it another go and started off but taking a piece of patterned paper as the background, then attaching broader strips of paper overlapping more so that they could be seen under the fringing - if you know what I mean! This looked much better as a starting point. I stitched both the yellow and the pink dotty paper onto the background before cutting the fringes - carefully. Much better.


But somehow the final result was still a bit lacking. The middle section lost the fringing once again and the sides of the wings have also suffered a little too. Perhaps the original designs had more adhesive behind the fringing?


Difficult to know for sure about some of the details that didn't work so brilliantly for me but I decided to gave one more set of ideas a try and went for the final iteration (#4).

Once again, I started off with a strip of background paper (black and white) at 2 1/2" and then adhered the next layer right over the top. I just glued about 1/2 of the way at the back of this paper (pale pink) so that I would still be able to cut the fringing after I was done. I was using up scraps for these butterflies which is why you can see two parts of the pink paper here but I simply used each side for one butterfly.


Then I glued a small strip along the top and stitched the pale pink paper so that there would be enough space below to cut the fringing.


Here you can see that I judged the level of the stitching to be roughly where the indent would be in the butterfly wings so that less fringing would drop off.


The brighter pink paper was then glued down - about 1/3 of the way down.

And then stitched.

Fringing was next and I just used my finer, pointed scissors to cut up to the stitching line on both layers. I had to push through the glued area a little but once the cuts were done, I could just press them back down which felt like a more secure way of dealing with the problem of the small strips being cut off.


I had cut out a template for the butterfly and when I placed it over the paper, I could see that I would need to cut it a little longer so that all four strips could be seen. I also needed to be more careful in that centre top section that I didn't cut all the way through the secured area so that those little strips didn't fall off as they had on other iterations.


You can see how I cut it a little longer and that centre section is much less deep into the pink paper.


And here's my final version which is so so so much better that that first one. Four different methods to get to this result! My little butterfly bodies aren't perfect but they add to the slightly imperfect effect of the butterflies in general.


Here are all six of my butterflies and you can see that the bottom two are a LOT better than the top two for example. Practice makes perfect. I'm sure if you were more careful with the butterfly template shape that you could make them even better but I'm happy with the results and will probably use them on cards or tags rather than on my pages for an added bit of whimsy.


These butterflies are not exactly part of my Counterfeit Kit Challenge kit this month but who said that you couldn't just forge something from the inspiration kit, just for fun? I'll be back in a couple of days to share my kit - I'm on the mini-kit team in March and was really excited to give the smaller format a go. I feel really inspired and am looking forward to sharing.

Don't forget that we love it when you share your own kits, creations or even forgeries and now there are even more ways to do that. You can link up from your own blog or our Flicker group on the Monthly Link-up Page over at the CKC blog. Or you can join our brand new Facebook Counterfeit Kit Challenge Community Group and share directly in the group. We hope that you will share and chat and find new friends over there too!

LinkWithin

Related Posts Plugin for WordPress, Blogger...