Friday, 24 June 2016

Counterfeit Kit Challenge June member blog hop

Welcome to the Counterfeit Kit Challenge June member blog hop. Nice to see you here again this month.

I'm kicking off the hop this morning so if you get lost along the way, head back to the Counterfeit Kit Challenge blog or you can find the full blog hop list at the end of this post.

Next up on the hop is Elaine so make sure you go over there and say hello - she always has such lovely projects to share!

This month, the Counterfeit Kit Challenge offered these challenges to inspire us to use our stash:

I decided to go with Challenge #3 - Everything old is new again. Give new life to the oldest items in your kit.But I have to say, all of the three challenges were appealing and I'm saving up the others to try to find time for.

First up, I looked through my June kit, Potpourri, and identified all those older items - frames and photo overlays as well as a bunch of chipboard die cuts, and a rub-on alpha. Some of those chipboard die cuts are SEI that I bought WAAAAAY back and they have a gorgeous copper metallic effect to them. And that gave me the idea of scooping up all the Theresa Collins die cuts that I couldn't imagine using and embossing them in copper.


I'm not sure if the embossing turned out as great as I had in my head but I'm happy with the overall layout using a photo I just took yesterday - love it when I get inspired like that.


It was great to find a place to use the leftover fussy cutting flowers that I had from the Scrapabilly June kit and also a few scraps from a previous Counterfeit kit that I threw into Potpourri to use them up.


I realised that you can't even see the copper embossing in the main photo so I tried to get a few shots to show the gorgeous rich colour. What I don't really like is the rough texture that I got - maybe I needed to do more layers?


Thanks for dropping by this morning. Elaine is next up, pop over and say hi! Here's the full list in case you get lost along the way.

Tuesday, 7 June 2016

June at Simple Scrapper #2


My second layout for Simple Scrapper this month matches up papers and embellishments from my Counterfeit Kit Challenge November 2015 kit, Remembrance (#8) with a current Story Starter on the topic of "Team Work" along with an older sketch.

It tells the story of the one and only time I was ever on a school sport team - many, many, many years ago! What is funny about this photo is that I found it in a box full of older memorabilia and hadn't even remembered that I had it. I scanned it for this layout and in the journalling, tried to remember the names of the girls not the team with me. It was only when I was putting the original back into the card folder it came in that I noticed a grid on the back of the folder with space for all the names! I at least have all the first names of the girls now. And I was wrong on one or two in my journalling. I will no doubt just correct the names on the back of the layout.


Scrapabilly shares coming up in the next days. Hoping to be more consistent in the weeks to come.

To find out more about the many resources and inspiration - including the sketches and story starters I use each month - available to inspire you to create beautiful pages and tell meaningful stories in a supportive, communicative community environment, check out the Simple Scrapper premium membership here.

Monday, 6 June 2016

June at Simple Scrapper #1


June at Simple Scrapper means another set of gorgeous sketches and a new list of Story Starters.

This first layout uses a current sketch along with a Story Starter from April 2014 - "Right Now". I adjusted the sketch to give me extra space for some longer journalling instead of a second photo.

I used my Counterfeit Kit Challenge May kit, Sprinkle (#3) and selected products which picked up colours from the photo as well as the accent gold.


Come back tomorrow for my second layout.

To find out more about the many resources and inspiration - including the sketches and story starters I use each month - available to inspire you to create beautiful pages and tell meaningful stories in a supportive, communicative community environment, check out the Simple Scrapper premium membership here.

Wednesday, 1 June 2016

Counterfeit Kit Challenge June kit reveal blog hop

June is here so welcome to the Counterfeit Kit Challenge June kit reveal blog hop. 

Hopefully you've reached me from Leslie's wonderful blue box reveal and next up is Lynnette who's sure to delight with her staging! And please don't forget to stop by our wonderful Guest Designer Salla. Oh yes! And of course, you simply must make sure you head over to our returning hero, Lesley, who's come back to help us out over the summer while some of our Master Forgers need to take time out.

Of course, you can head back to the beginning of the hop at the Counterfeit Kit Challenge blog to make sure you catch everyone on the hop and the full list can be found at the end of this post.

This month, Leslie has challenged us to be inspired by the Hip Kit Club's May kit. There are actually 6 different kit selections to choose from and I took the main kit, the embellishment kit and the pocket page kit to use for my own creation this month. 

Main kit

Embellishment kit

Pocket Page kit 

Now, mine doesn't look much like the original kit elements but let me introduce you to Potpourri!


My kit also seems quite a lot bigger than I've been trying to make recently but I did follow my "rules" of 5+1 papers including older papers, some bits and pieces from my die-cut bucket, some partial alphas that need using up, a bunch of pocket page cards, some tools and random bits and pieces.

My list of elements to lift from the original kit was long but these were the items that drove my kit decisions:

  • pink, navy, lemon, brights
  • dots, stars, floral, triangles
  • pocket cards with words, hearts, arrows, cameras
  • enamel dots, frames, clips, flairs, sequins, puffy elements


In the end, my papers were not as bright white as I had originally hoped for but I'm happy that I managed to find spots, triangles, the navy stripes and my random paper was the gold foil polka dot paper. I think I'll have fun using these.

I added in way more bits and pieces than I have been the last few months because I noticed that during my LOAD month, I often felt like my kits didn't have enough embellishment choices.


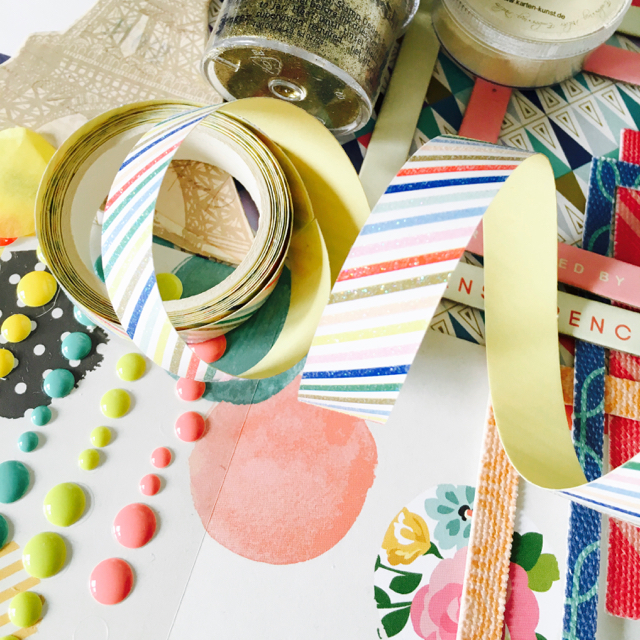
I added a whole lot of different tissue confetti pieces as well as some star sequins and a bunch of die-cut pieces that are both older and newer. Let's see if I use them up.


I only had a few puffy stickers in my stash so in they went. And a selection of pocket cards mostly with cut out elements.


I threw in a whole bunch of frames and some mini cards that I came across.


The London die-cut is one of my random items and a wonderfully thoughtful gift from my good scrappy friend Kathy.


I've also included some embossing powder in the hope that I actually get around to using it.  :-)

There are actually a few more bits and pieces that I ended up throwing into my box - the last scraps and embellishments from my Scrapabilly June kit which featured lots of pretty watercolour florals and a handful of last scraps from my May Scrapabilly kit.


Wow, long post so well done for reaching the bottom! Here's the full hop list in case you get lost along the way.

Guest Designer: Salla at Crazy Quilt of Paper... http://pistojapiiri.blogspot.com/
Julene:  http://julenebydesign.blogspot.com
Kelly: http://66.147.244.112/~honeysv0

Sunday, 29 May 2016

Bad blogger - May shares at Scrapabilly #2

If you joined me yesterday, you'll know that I'm trying to fit in my Scrapabilly May Kit des Monats shares before the new month hits because I'm woefully late with blogging.

So, let me remind you of this gorgeous kit featuring papers and elements from the "Sea Breeze" collection by Kaisercraft.


I made four layouts with the kit because several of the papers just needed using in larger blocks so that the pattern could shine! Here are the last two layouts.

Several of the team made similar layouts earlier in the year and this month, I decided to jump on the wagon and make my own. The colours of the Scrapabilly logo seemed to match these papers particularly well.


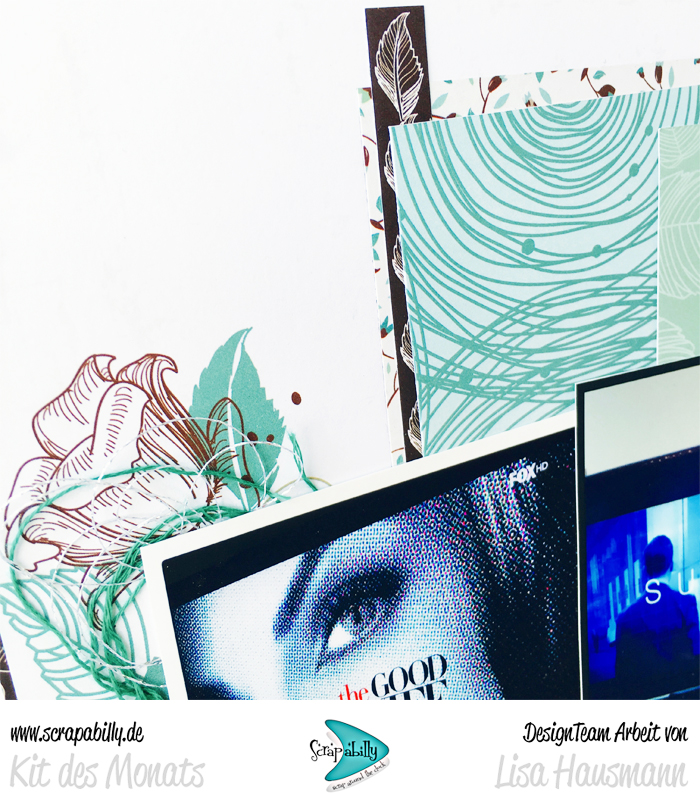
This month, I received the kit in the post (I usually collect it in person) and it comes wrapped in gorgeous Scrapabilly aqua tissue paper. It seemed to call me to use it on this layout so I punched out a bunch of confetti (breaking my punch in the process    :-( which makes me really sad) and then created a messy line along the bottom of the paper block.


I also used the tissue paper to mat the photo several times just to make sure there were elements in different places on the layout.


I love the dimensional effect this technique gives the layout while still remaining delicate.


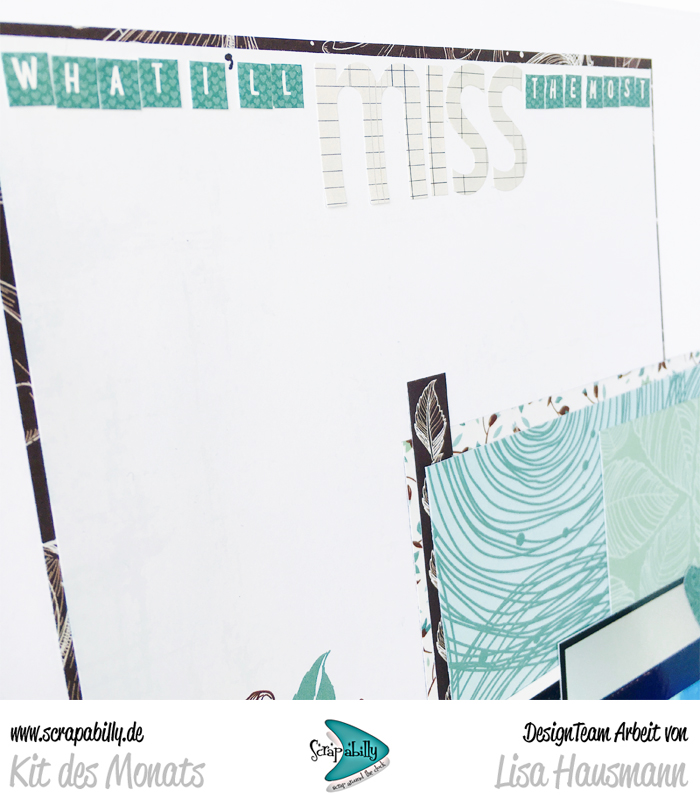
Last but not least, I decided to just record something from my everyday about what I will miss when our Sky subscription ends.


When I looked through my photo library, these two photos seemed to work well with the papers and this is just the kind of odd story I like to include in my albums.


And there you have it. Another month of creativity provided by a kit full of gorgeous products. You might be lucky enough to be able to grab your own kit if you go over to the Scrapabilly shop here.

You can find the full Design Team work over at the Scrapabilly gallery here - make sure you check out all three teams because there's a lot of gorgeous stuff out there.

Saturday, 28 May 2016

Bad blogger - May shares at Scrapabilly #1

Better late than never.

Seriously though, I'm late sharing May's Scrapabilly Kit des Monat shares but I really wanted to squeeze it in before the end of the month. Sorry for the delay.

May's Kit des Monats features papers and elements from the Kaisercraft "Sea Breeze" collection in gorgeous green and blue tones with a little brown thrown in for good measure. It was difficult for me to know which side of the papers to use as I loved them all. However, the swirly circle print (far right below) was by far my favourite.


I added in a little extra of the dark green twine so that I could make this hand-stitched grid. I've done this design several times before and every time I do, I curse how long the stitching takes but then at the end, I love the result and the time is forgotten!


I used a Heidi Swapp Color Shine mist to colour the bird cage and add some splotches across the layout.


Yet another "stolen" Instagram photo of my adorable niece. I couldn't believe how the colour tone of the photo matched the papers exactly.


The large floral print paper cried out for fussy cutting so fussy cut I did. I had already printed out the photo of the cover of the Simple Scrapper membership magazine featuring my layout and again, lucked out that the colours matched the papers so perfectly. These papers and patterns seemed to encourage a much simpler style than I might usually use and there's such a lot of white space (literally and figuratively.)
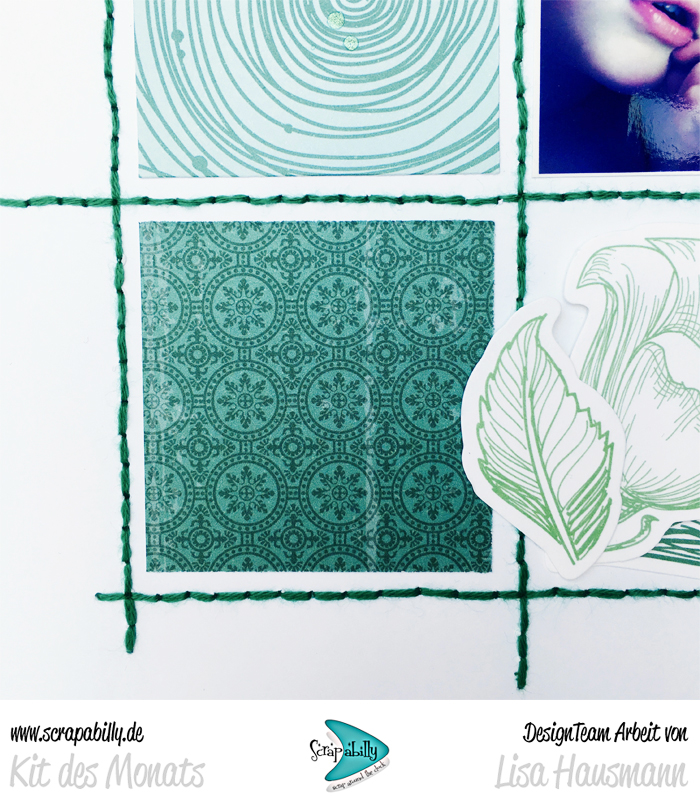


This layout was so self-explanatory that I felt it didn't need any journalling the than this small label. I don't do that often but I really couldn't think of anything else that needed to be said. The fact that I scrapped it should indicate to the viewer that this is something I'm proud of!


Dimension and layers were created using a mix of foam dots in different heights to raise the edges of different parts of the floral background as well as the photo itself.


You can find the full Design Team work over at the Scrapabilly gallery here - make sure you check out all three teams because there's a lot of gorgeous stuff out there.

LinkWithin

Related Posts Plugin for WordPress, Blogger...