Challenge #3 on the Counterfeit Kit Challenge site is to use stamps to create an embellishment.
I decided to make a tag that I could then use on a layout. We had done some of these in a class over at BPC with Nic Howard and I had loved them as add-ons to layouts. They take a little time, but I made three at the same time (though not deliberately - let's say that there was a steep learning curve!).
I took photos of all stages of all three tags but I'll just share the last and most successful one!
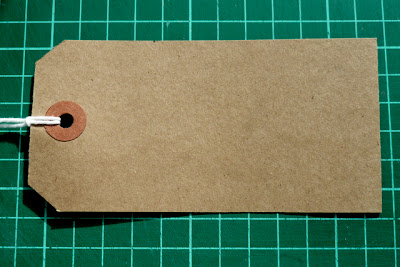
1. I started off with a plain shipping tag from my September Notes kit.
3. I covered the whole tag with Pretty In Pink from Stampin' Up using my Tim Holtz distress ink applicator. You can see that the colour was subtle but that some of the paint picked up the ink.
4. Learning from the first tag, I then stamped a BG word stamp using StazOn black ink in the middle of the tag - the word didn't take very well to either a pre-embossed image or to the painted area.
5. Using the Martha Stewart butterfly stamp again (in love!) I stamped and then clear embossed the butterfly.
6. Now I moved onto two shades of darker ink, using Worn Lipstick Distress Ink around the edges and a little towards the middle and then just the edges using Close To Cocoa from Stampin' Up. I've learnt that you have to start with your palest colour and then work up to the darker one in just the areas you want. The kraft tag obviously affects the intensity of the colours and it would be great to try this out on a cream or even white tag. I just didn't have any.
7. I added a little extra embellishment to the tag in the form of some pearls (from August's kit) and a flower as well as a ribbon tie and then did something similar with the first two tags I'd made which hadn't turned out exactly how I'd wanted.
I'll be using one tag on a layout using Departing Summer (I'll be sure to post it when it's done), one will go into a little gift box for someone special and the other will be ready for when I need a little extra on a layout. It's always great to have things ready made for such occasions.
Two more things to remind you about.
1. This month's sponsor over at the Counterfeit Kit Challenge is Master Forger Sherri who will be giving away a set of her stamps from her etsy shop (http://www.etsy.com/shop/ShareCroppersKits). All you have to do to have a chance to win is to participate in the Counterfeit Blog Hop next Wednesday (28th) or comment on either of the blog hops - Master Forger Hop on Tuesday 27th or the Counterfeiters on Wednesday 28th.
2. Go over to this post of mine (here) and leave me a comment to be in the drawing for a small prize. I'm celebrating 5 years of blogging and I'm thanking all my blog readers for coming here and being a part of my scrapbooking life. The draw will stay open to the end of the month!


Gorgeous tags, fab stamping.
ReplyDeleteLovely to see your creative process and learn from your mistakes - the tags are beautiful and that butterfly stamp is just divine!
ReplyDeleteThis is lovely, the layering of courers is fabulous, looking forward to seeing it on your layout
ReplyDeleteLisa,your tags are gorgeous !!!!!!! You've just shown us that you can stamp,I look forward to seeing more stamping now on your cards and LO's. It was great to see you on Tuesday and thanks for those yummy cupcakes.xxxxx
ReplyDeletePretty! You certainly don't look like a novice stamper to me. I keep telling myself that it's like everything else, if I practised a bit more I'd get better at it!
ReplyDeletegreat tag - so many different things on it.
ReplyDeleteBeautiful tags, very pretty - I love your step by step photos too!
ReplyDeleteLove your tag and appreciate the step by step photos.
ReplyDeleteBeautiful tags! Love 'em!
ReplyDeleteI actually started all this creativity with stamping so I quite like stamps... although I don't use them very often... every now and then though I incorporate them. I think you do a great job of stamping Lisa!
ReplyDeleteGorgeous!! I love the shabby chic look on your tag!
ReplyDelete