Monday, 4 May 2015

Forgeries on the Fourth

for·ger·y
ˈfôrjərē/
noun
  1. the action of forging or producing a copy of a document, signature, banknote, or work of art.

    (logo courtesy of the Counterfeit Kit Challenge blog!)

Just a little how-to today. Something quick and simple (very much my style) to add a little personality to your kit.

I decided to have a go at the rosette elements in the kit and have now come up with three different types, each taking less than five minutes so you could easily make them up as and when you needed them for the layout you were making.

If you check out the Counterfeit Kit Challenge blog post today, you will find a whole list of possible forgeries to complement your kit and you can also find the original post where Bethany tackled the rosette flowers using book paper so you don't forgetter to pop over there to check it out as well.

First up, here are my three different flowers.


I showed the first two last week when I revealed my kit. The left hand side one is made from vellum and was the best of the three I made (you have to be careful not to score the paper too hard and tear the vellum, and achieving the best number of folds so that it forms a nice flower - not too many and not too few - is tricky). The yellow flower uses tissue paper and was just a test one to check out the process. The white one below was made yesterday and I took photos to show you how easy it is to make - you could honestly fill your kit with rosette flowers in very little time if you wanted!

The original rosettes used dress pattern printed tissue by the look of it and I looked at some of my dress patterns but decided that the tissue was way too yellow for my bright kit. Therefore, I took some tissue paper from my dress-making basket which was from a large pack to make your own patterns. It's very soft but made folding etc easier. It's a bit of a trial and error thing!


I cut a long 2 1/4" strip of tissue and this time around, I decided to stamp on it to mimic the original and to give them some detail. I don't have many stamps and some sort of a swirly background stamp would be really good but I thought that these hearts would be a nice idea - small enough to see through the folds. I used grey ink and didn't worry too much about the quality of the stamping.


I then started folding it up, concertina style - one fold forward, one fold back. I think each full strip was about 12" long and again, trial and error showed me that fewer folds was better but it needed enough to make the circle full. I would imagine that each fold is about 1/2".


Next up, I stapled the middle of the small folded pile and then cut notches into the middle. The staple helps give the rosette some stability. I forgot to staple this one before I took the photo. I also trimmed the ends - consider a point like this or just rounded like my end result.


Tie a length of twine round the middle and make a small bow if you wish your flower to be topped off with this effect. If not, just tie it and trim the ends. Only if you tie a bow, will your twine be visible.


Glue the two flat ends on each side so that you can bring them together to make the full rosette. For my vellum flower, I used my tiny attacher which was fiddly. Then I cottoned onto double sided tape which is strong and much easier to get to stick together.

Et voila! You have a rosette. Just tease out the folds around the circle to even it up and that's it.


I'm not sure how stable they are going to be on my pages once they go into page protectors but they are so pretty that I'm sure to have a go at using them during LOAD515 this month. Watch this space.

Don't forget to check out the other forgery ideas over at the Counterfeit Kit Challenge blog and to share your own forgeries.

Friday, 1 May 2015

Counterfeit Kit Challenge May kit reveal blog hop

This month at the Counterfeit Kit Challenge we have the theme, "Everything old is new again"! But that's all a matter of interpretation, isn't it?!?

To coin a phrase used by Leslie in April, I've gone rogue this month! But more of that shortly.

First of all, hopefully you are here for the Counterfeit Kit Challenge May kit reveal blog hop and have reached me via Leslie and then when you are (eventually - it's a looooong post today) finished, you can complete the three L's and hop along to Lynnette. If you've missed the beginning of the hop, go back to the Counterfeit blog and start there - this month is especially fun so you won't want to miss any of it. The full list is at the end of the post.

And please, please, please don't forget to drop by our Guest Designer, the wonderfully talented Susan! A member of the Scrap Happy family who we've enticed over to the other side (ha ha not really!) that is CKC, we are simply delighted to have her on board this month. She is an awesomely talented scrapper so go over and say hello!

Now, back to "Everything old is new again"...

This month, we are looking back at the FIRST EVER Counterfeit Kit Challenge kit for our inspiration. Obviously, the links to the original kit are no longer valid but here's the photo of it and the link to that historic moment in time when the Counterfeit Kit Challenge kicked off in style!


And to add fun into that original Jenni Bowlin inspiration kit, here's the JBS April 2015 Magpie embellishment kit that we have been offered if you need more "stuff" in your kit!


I'm going to take you through piece by piece how I went from that kit above to this kit below, but first let me present my May kit, Rejuvenate!

Can you see it? Squint and tell me what you see. Mmm.... not much similarity between the warm tones of that kit above with my very much "Lisa" kit below, but bear with me and I will explain all.


I started off by looking at all my older stash and wondering how I could work in newer items to make a "new meets old" idea. But it wasn't speaking to me. Then I saw all that old stash and thought, well, I'd just make up a real vintage kit using products bought a long time ago. But I couldn't get that to work for me either. Now, there's absolutely nothing wrong with making up kits using older items, in fact, that's one of the main appeals of counterfeiting your own kits. But I decided to reinterpret the old kit in modern day scrapbook items.

I made a list - and checked it twice - to see what patterns and colours and designs I could see and then went off into my new items to find new versions, thinking about what was fashionable then and now, what particular designs were all the range then compared to what seems to be in every collection pack now and what colour combinations are more popular now - just a few examples of how my brain was working.

Take a walk with me...

I don't include cardstock any more in my kits (free items), so let's start by looking at the papers working top left to right and then bottom left to right:

White Creative Imaginations paper with the blue lines became thick ombre blue stripes onto an off-white background. I don't seem to have so much pure white for a start and paper that is just lined paper doesn't really seem to be around much either - at least not in my stash. (Pink Paislee - Atlas, Take Flight)


The paper with a repeating school-type alphabet reminded me of script covered papers such as Maggie Holmes for Crate Paper - Remember This


Next up is the brown paper with blue spots and large floral patterns in the corners. I found this very modern floral design on a spotted background in much more up to date colours which seemed to match in concept if not colour. (Webster's Pages - Beautiful Chic, Interior Design)


Down to the bottom line of papers, I can see a photo-realistic floral, lace design that I remember was all the rage. Thinking about the very popular trend of photo-realistic papers today, I thought about how lace could be reconsidered and came up with bokeh patterns. Knowing what a good resource Webster's Pages is for these photographic designs as well as the bokeh I love so much, I found this piece to add to my kit - seemed to match the other papers I'd picked out so far too. (Webster's Pages - #Happy, Dancing)


Next up is a piece of paper which looks like multi-coloured bands of lace and ribbon. My eye landed on this sheet of washi tape strips and it seemed a perfect match. (Maggie Holmes for Crate Paper)


There was a little discussion on the board about the next green paper before we identified that it was Sassafras (you can tell by the fancy border which can be seen along the top of the green). I think many of us miss Sassafras which made me think about October Afternoon and how delighted I was to find some new OA papers at Scrapabilly recently. The two manufacturers were around at the same time and then I thought about that green and considered how there isn't so much normal green to be found these days - or again, at least not in my stash! It seems to be more along the blue scale with turquoises and similar tones. Combining these two thoughts, this paper appeared to me. It's much more along the green spectrum in real life. (October Afternoon - Treasure Map, Siren's Point)


The last paper in the original inspiration kit is a BasicGrey red lace paper. I don't know about you, but I loved all those lacy designs. Couldn't get enough of them and they were so "in". Designers showed us all how you could use them to cover up the background but still give us a peek at what lay underneath. What item do we have today which has a similar function and can be seen all over the collections and online? Which items are my love right now and luckily one that I use a lot of? Easy - mixing vellum with gold stars means that the design underneath can be seen and it's absolutely the in-thing! (Crate Paper - Confetti, Star Vellum)


Now onto the embellishments...

I see date bingo cards. How many of those have I got through over the years? Perfect for all sorts of pages and still to be found today in many recent collections in the form of inspiration word bingo cards such as in the Simple Stories I (heart) summer collection (also added in to my kit for good measure). And then I thought about all the wonderful cut apart sheets we get these days which can add some decoration or a title or be used to indicate our thoughts or dates or journalling. The Webster's Pages #Happy cards were a perfect modern addition.


The 7Gypsies sticker sheet is a classic item and similar stickers can definitely be found here and there today. But these days I use stickers to add for adding decoration, a date or just a pertinent word so reinterpreted it as a full sheet of sticker items. (Webster's Pages Capture Life)


The original kit has a small set of Sassafras orange alpha stickers which very much matched the papers in colour. So I reached for my matching October Afternoon Mini Market Sea and Sails set of alpha stickers but added in the Webster's Pages Capture Life alpha sheet because it matched the rest of the kit and I know I need both large and small letters.


The 3 black Maya Road doilies were translated into three foil mini-doilies as befits many of my kits! One silver, one heart and one gold.


Sassafras metallic flowers were a wonderful new embellishment when this kit came out and back then I used a LOT of flowers. But these days, my go-to pretty embellishment is confetti or sequins. The flowers are large so I picked out some large My Mind's Eye paper confetti (designed more for parties I think) which I can layer up in a similar way to those metal flowers.


I spied a picture turn and brad. I did have some of those back in the day. I think I even used some at some point. But today, I take the easy route and use enamel dots. Much easier to add, sprinkle, position and match the colour scheme of the layout.


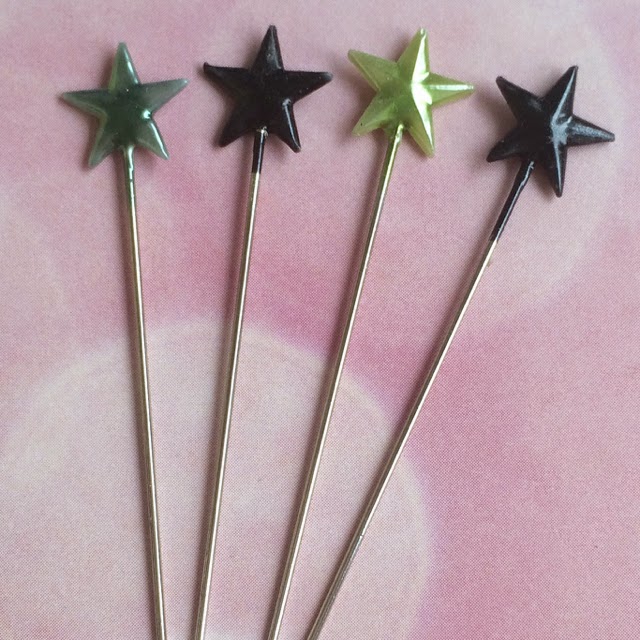
The original kit includes two green pins. No need to find a new way to think about that - I have pins and use them in very much the same way as the past. Two green and two black stars match both the colour of my kit and the designs that can be found on the papers. And four rather than two? Just because I always need more!


There was a lot of embroidery threads included in scrapping back then - to attach buttons or actually stitch on the layouts. This kit has a nice amount of thick, bright yellow yarn which I didn't need to substitute. These days, I prefer the finer baker's twines we have or of course, my go-to gold twine so this was a perfect addition.


And last but not least, there was a pack of Studio Calico pattern paper rosettes. They look really up-to-date to me and decided just to have a go at making my own as I didn't feel the need to reinterpret them. I tried star printed vellum in a couple of different sizes, this one below being the most successful. And then I tried it out using tissue paper. This was much more like the originals and was easy to make - maybe something for Forgeries on the Fourth. White tissue paper would have been better but only having this yellow, I had a go and came up with something I was happy with. If I can track down some white, I'll make up some more but all in all, a good interpretation of something which didn't look as dated as some of the other products.  


And just because this post is already photo heavy and very long, why not add a few more close ups so that you can see how all the elements of the kit I've picked out go together!


So, there you have it. An older kit reinterpreted in new, trendy, up-to-date products. Yes, there's a lot of pink a sprinkling of gold and stars and a smattering of pretty that can't really be seen (at first glance) in the original, but it's all me and is truly inspired by the Jenni Bowlin kit. And who knows, maybe in 5 years we'll be looking at this kit of mine and reinterpreting it again, in whatever is the product of the 2020 moment!

This really was a mega post today so well done if you've got this far. Next up is Lynnette and here's the full list in case you get lost along the way.

Now, if you don't mind, I need to go and start cutting into all this gorgeous paper!

Friday, 24 April 2015

Counterfeit Kit Challenge April member blog hop

Gosh, I've been a busy blogger this week! This will be my fourth post which would be great if I could keep it up. Let's see.

Hopefully, you're here for the Counterfeit Kit Challenge April member blog hop and I'm at the end of the list, so you should have reached me via K's blog and I'm sure she wowed you with her creations. If you'd like to start at the beginning, head back to the Counterfeit Kit Challenge blog and the full list is at the end of this post if you get lost along the way.

This month, we were offered the following challenges over at the Counterfeit Kit Challenge:
Challenge #1: Pick A Challenge ... any challenge. Scrapbook, craft or in fact any challenge

Challenge #2: Sketch Challenge  using a sketch by Paper Players
Challenge #3:  Spring Challenge - Let spring inspire your next project
Each of these appealed to me in their own way but in the end went with the Spring Challenge. When I think of spring, days full of sunshine, Easter, yellows, bright colours and general fun springs to mind. What about you?

Diving into my kit box holding my April Vivid kit, I found the gorgeous sunburst paper and that was it - I knew exactly what I wanted to do. Some cutting, stitching, distressing and layering featuring a rather unusual Easter Egg and I was done. This came together so well.

Counterfeit Kit Challenge February kit, Vivid #1


I actually enjoyed using up the brads I included in my kit and will no doubt throw in a few more. I have thousands!

Not a lot to say about this page because I think the details show you what you need to know! It was fun to make and about a silly topic which made me smile all the time I was making it.

So, I'll send you on your way. Don't forget to leave me a comment and let me know you were here.

Here's the full list in case you get lost along the way.

Here's the Blog Hop order ...
CKCB   http://www.counterfeitkitchallenge.blogspot.com 
Jemma   http://just-jimjams.blogspot.co.uk 
Sherrie   http://sherriesmuddlepuddle.blogspot.ca 
Julie   http://jsquaredscrapspot.wordpress.com 
Leslie   http://lcsmithsaved-outofthemire.blogspot.com 
Julie   http://spendlesscraftmore.blogspot.com.au 
Tina   http://tinasscrapcorner.blogspot.com/ 
Margie   http://scrappinmargie.blogspot.com 
Maggie   http://maggiebscrapblog.blogspot.fr 
K    http://kscraftycorner.blogspot.co.uk/ 
Lisa   http://lisahausmann.blogspot.de

Wednesday, 22 April 2015

Wednesday Wonderland

It's been a long time.

I don't really know why but I just haven't found the time to make cards over the last month or so. But I decided to sit down and get Jingling along with the girls over at Jingle Belles. I did actually make a few more back in January that I didn't get around to sharing so the pile is not too bad but at this rate, I definitely won't have enough by the end of the year so I better keep playing!

This week's challenge is all about being kind to our planet with "Let There Be Peace on Earth (Day)" and make our cards using re-cycled, up-cycled or re-used items.

I can do that.

I managed 5 cards which has boosted my rather small pile of holiday cards and proved to me that these do not have to be works of art. Simple is good.

My first card is über-simple, die cutting the central motif from a lovely card that I'd kept from last year. All I did was mount it on red cardstock with a length of ribbon saved (probably) from a Tiffany gift. I also included three small fussy-cut sleighs inside the card just to make sure I used them all up.


Card number two also features a fussy-cut element - the mittens - from a saved card. Then I die-cut the white stars and the sentiment from the same card and added some silver sequins. The white tag was part of an advent exchange gift. All simply mounted on red card. Both these cards were done in about 20 mins. Simple!


This card features items from two different cards. The gold wreath in the background, which I've mounted on gold glitter cardstock, was cut from one card and then the tag, snowflake and sentiment was salvaged from a gorgeous hand-made card I received. Mounted onto white card with some gold mist splats. Simple, simple!


And the last two feature central elements cut from a few tags that I've had hanging (pun intended) around in my Christmas drawer for about 5 years. Double mounted with a small sentiment and a bunch of messy thread. Again, it's all about the simple.


Nothing majorly complicated or time consuming but enough to get me back into the feeling that I really should be making my cards on a regular basis. Jingle Belles is fun and at the end of the year, it feels so good to have that pile ready to go.

Won't you play along too? New prompts up every second Friday. Looking forward to the next one now. Let's see if I can keep it up.

Tuesday, 21 April 2015

The Big Reveal!

Yesterday, I hoped you joined us in our extra Counterfeit Kit Challenge spring team activity, "Scrap Crush" where we created pages inspired by one of our (no doubt many) scrapbooking celebrity crushes.

We asked you to guess who they were and comments on yesterday's posts will be put into a draw on Friday 24th for a small prize. Who doesn't love a giveaway?

Many of you made some good guesses on mine but first, let me enlighten you with the problems I went through with my page.

When I first set the challenge, I knew right away that I wanted to crush on Ashli Oliver (soapHOUSEmama) whose style is one I totally love. I should have just sat down and made my page right away. But of course, being Last Minute Lisa means that I didn't. Noooo, I waited until just a few days before our challenge only to find out that another of our Master Forger team had chosen her. Bummer! Of course, I could have just continued - the MFs didn't know each others' crushes but because I was coordinating the challenge, I did and thought that as I knew, it would be better if I made another choice - to keep up the variety.

If I had continued with Ashli, I would definitely have looked at these layouts as inspiration - as well as all the others I have on my Scrapbook Pinterest Board of course.

Ashli Oliver at Purple Mailbox

Ashli Oliver for A Flair for Buttons

Anyway, Leslie did a fantastic job of nailing her artsy, pale on white, whimsical style so I will save my take on Ashli for another day.

So, then I decided to go with another of my crushes. One that I've had a long time. I've talked about her pages before on here and find her layered up, relaxed style so appealing. I think Rahel Menig over at Swiss Girl Designs is just so talented and I had plenty on my board to look at, such as this one

Rahel Menig for Blue Moon Scrapbooking

I picked out the idea of very minimal colours on a white background with a large amount of layers. Nothing is cut using a trimmer - just by hand with scissors, or even just torn. There are layers of tissue paper, lots of thread, some papers along the top, usually a large and small letter title, black handwritten journalling and small photos.

I came up with this.

I think I need to add that the title is a quote by Coco Chanel herself - this should be on there otherwise it looks like wise words from me!

I used my April Counterfeit Kit Challenge Vivid kit for this, selecting the papers with just a hint of colour to contrast with that bright scarlet tissue paper

I felt that the colours I'd selected were somehow appropriate for Chanel and was surprised to be able to come up with this toned down page out of that brightly coloured kit.


I've never used tissue paper on my pages before but I likes the translucent effect it gives and the rough, torn edge gives some interest to the layers

It was only after I'd finished the page and went over to look at Rahel's blog did I realise that she has given up scrapping to concentrate on her photography. Fail!

That is when I moved on to someone who's been fascinating me for some time, and seems to be one of the names of the moment. I first came to know her name when she was a Garden Girl and I was fascinated with how many different page designs she could come up with based on quilts and patchwork patterns. And how much patience she had in executing these elaborate designs. She's quite the girl for mixing patterns and using tiny scraps of paper in repeating designs and shapes. Paige Evans of course! Who else could it be?? She lives right here in Germany too which made me smile. And her family is racing round the country and Europe getting as many impressions as possible while they are still here. Her list of places visited in the last 18 months or so is incredible and puts me to shame!

I am particularly in love with this page

Paige Evans for American Crafts

And this one too

Paige Evans for Studio Calico

I already shared my page yesterday, but just for direct comparison, here it is again.


But I also mentioned that I had a bit of a nightmare with this one too - it really tested my patience - perhaps the background was too complex for a first attempt!

I cut out the main background overlay and added foam squares to give it a hint of dimension. First 30 minutes of work! But so far so good.


Then I realised that adding all those shapes to the background was going to take precision work. Every space was small and different to the next. But I persevered with an extra template to cut out the shapes slightly larger than the "hole" as well as using it to show me where to stick it. The background doesn't look very good while you're working on it!


But then I was finished! Hurrah! Only to find out that I'd done it back to front so to speak and the overlay I'd already prepared was mirrored with the foam dots on the other side!


Then I had to cut out another overlay and giving up on all the effort of the foam dots, I decided just to use a glue runner and promptly stuck it to my mat. When I lifted it off, some of the front of the overlay came away and THAT is the reason I have the large doily top right - to cover that up!!! Talk about a difficult birth. But even though I went through all this "trauma", I had a lot of fun and LOVE the final result.


I am still in awe of Paige and will continue to ooh and ahh over her creations, even if I don't manage to make so many of them myself. She has a class over at BPC which I will check out.

I could have chosen any of at least a dozen or more Crushes for this challenge (Shimelle, Wilna, Janna Werner, Jill Sprott, Marcy Penner, Sasha Farina just to name a few) so maybe I'll save those girls for another day and another go at this challenge. Won't you join me?

Don't forget that there's something to be won if you comment on any of our posts from yesterday's blog hop. All names will go in the pot for comments posted by the end of Friday 24th April and I'll pick a winner out over the weekend.

LinkWithin

Related Posts Plugin for WordPress, Blogger...