Thursday 6 July 2017

Counterfeit Kit Challenge July mini kit reveal

I expect that you're surprised to see another post here on the blog, making three posts in less than a week. Fluke or intention you may ask. More fluke I'm afraid. I mentioned on my Counterfeit Kit Challenge reveal on Saturday that I hadn't needed to make a full kit this month so that post was unexpected. Then the Forgeries on the Fourth post on Tuesday should have just been a share on the main blog. But as I had my usual ups and downs, I had to write a full post. 

And here we are to the scheduled post for my mini-kit reveal.

Regardless, I hope you've enjoyed the extra material and you never know, I might even continue to post more regularly, I am woefully behind on all sorts of posts - I need to share my Scrapabilly kit shares, my Simple Scrapper Creative Team layouts and also my 17 loves. Let's see...

In the meantime, my mini-kit...

Here's the original inspiration kit - Cocoa Daisy August 2016 kit, "Walden Pond". Find all the details here.


I thought that I'd like to make a kit for some cards and when my eyes fell on my overflowing scrap box, I decided it was time for action.


I attacked it with a vengeance, clearing out the papers I really didn't want and sorting those into donations for my niece or the (pink) round file. 

Then I picked out a bunch of scraps in the colours (yellow, green, blue, red) and approximate patterns (spots, small florals, spots, repeating pattern, stripes) which I thought would work well for the smaller canvas of cards.

I haven't given this kit a name because I did give one to my main kit but here it is. 


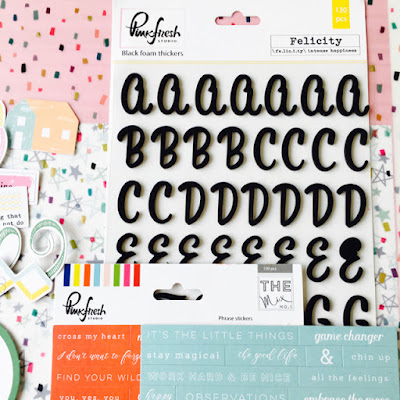
I added in a selection of mini die cuts, some left over puffy stickers and a few other random bits and pieces that caught my yes and then added in the Pinkfresh Studio alphabet that featured in the original Cocoa Daisy kit. 

As a last thought, I also added in some cut apart elements from Crate Paper although they didn't really match the original.


The forged card bases that featured in my Forgeries on the Fourth post make an appearance in my kit and were immediately finished off with a few words, some enamels (added to the kit) and die cut pieces. 

And then I just took the papers, cut them up and layered them all on top of each other to make really super simple, quick and easy cards. Some twine and doilies might also have found their way into the kit! 

Within an hour or so, I had finished 12 cards which will be so useful to have on hand.


And what about my scrap box now? I think it's fair to say that inroads have been made but much more needs to be done. My niece now has an oversized pizza box ready to receive and this is what I decided I needed to keep...


But there... in the corner... I can see the bottom of the box so I call that a success. So many pretty papers, I really have to get them used up.


If you make a mini kit this month, or are inspired to make some cards with your CKC kit, don't forget to share. We love to see what our followers are making!
Tuesday 4 July 2017

Counterfeit Kit Challenge - Forgeries on the Fourth

You know me... I'm a bit of a lazy crafter. 

I love the forgery side of the Counterfeit Kit Challenge - the idea of making your own takes on kit items but using your own ingenuity and stash - but the reality is that I often don't make the time and often go for the printable options instead.

But when I saw the original inspiration kit this month, I spied the acetate words and wondered if that would be an idea for me to make. Then I took another look at the kit and saw that there were three papers that would be really easy to make a version of... or so I thought!
Care to take a trip through my trials and tribulations? 

I started with the hatch design paper by Pink Paislee - the blue/green one. I found a scrap of watercolour design paper to try out how I thought I could make it. 

First up was to draw some squares which were about 1"-


And then I used my ruler and a black pen to fill in the lines. Mmmm - not so good! The ink smudged and the lines were way too close together and then I realised that the original paper must have been 2" squares instead.


So I took another scrap of more greener paper - it was quite a large scrap to be honest but I'm planning to use it in smaller pieces on cards so it will give me a bit of flexibility.

Again, I started by drawing some squares - this time in 2" squares.


Then I started with the lines and used a Uniball rollerball pen which didn't smear. I began using a ruler and then realised that a freehand line would match the original better so off I went. Very imperfect lines but the overall effect is definitely close to the original. The wobbles and imperfections won't show up once it's all cut up for cards. That's what I call a success.


I realised that the white spots on yellow might be easy to create with a white pen or pencil. The pencil was a no no (you can see a couple of lines there on the right which didn't work well at all). Of course, the ongoing problem with my white pens (what am I doing wrong? why do my pens all dry up even though they are full?) meant that the spots and lines are again, not perfect. But for cards, I think the paper will work fine. Relatively successful and completed in just a few minutes!


The last of the three papers that caught my eye was the Pinkfresh Studio sheet with the strips of colour and some lines of text.

I decided to just use some thin washi tape to give the translucent effect that the original paper had and just stretched them across the paper randomly.

I found a few scraps of words in my box and added in a few to the strips.


Once all the edges were trimmed I was quite pleased with the outcome. Not exactly the same as the original, but definitely inspired by that gorgeous sheet of paper.


Giddy with the success I was experiencing, I decided to make some card bases (6x4") using some odd strips of paper from the bottom of my scrap box - many manufacturer strips that I can't bear to throw out! These three bases have already been transformed into cards so make sure you check out my mini kit reveal on Wednesday for the details.

The top base uses some of the washi paper from Crate Paper.


Last up was my original idea - the acetate words.

I knew I didn't have any printable acetate in my supplies and therefore decided to make some print and cut words on vellum. Sounds easy right? I've done it before and it was easy so this wouldn't take long... or so I thought.

I found some words in my Cameo library, added them to an A4 template, added the print registers and filled the words with colour. That was new for me and I loved the result! I knew the vellum wouldn't be as bright as this template but isn't it pretty?


First print out onto vellum was a fail. I have no idea what went wrong here but I just got a middle length of print. However, I loved the effect on the vellum so I knew I was on the right track.


I tried it out by printing on regular paper - should have tried that first! But it showed that it worked and showed me how great those phrases were going to look.


So I printed them out again - this time successfully, added them to my cutting mat and sent it to the Cameo and waited expectantly.

However, the Cameo couldn't find the registers and ended up cutting all these phrases about half an inch to the left. And of course the cutting mat was too sticky and all the vellum tore while I was trying to remove it.


  • Tip number 1: if you are using vellum, make sure your mat isn't so sticky. Sticky enough so that it's firm on the mat, but not as sticky as you need for cardstock maybe! 
  • Tip number 2: if the Cameo can't read the register marks, it might be that there's not enough light. I used my torch function on my iPhone over the Cameo and off it went without a hitch.

Look at this wonderful sheet - can you see the cuts?


I really took my time taking the vellum off the mat and taking out the tiny insides of letters or words. I am proud to say that I didn't tear a single millimetre of any word and was thrilled with how they looked!


Look at this - so cute! Can't wait to use them. I'm not sure if I'll be adding these into my full kit (which I revealed on Saturday) or my mini kit - come back on Wednesday for those details.


Another hugely long post so well done if you've made it this far. As and when I use my items featured here, I'll make sure to show you but in the meantime, make sure you share your kits, projects and forgeries! We LOVE to be inspired by YOU.

Counterfeit Kit Challenge blog Link Up Page
Counterfeit Kit Challenge Facebook Community group

Saturday 1 July 2017

Counterfeit Kit Challenge July kit reveal blog hop

Can you believe that it's July already? It's shocking but true so here we are with another Counterfeit Kit Challenge kit reveal for the 1st of the month. 

You can find the full hop at the end of the post and hopefully you came here from Lynnette's amazing reveal but then again, I'm a last minute entry to the hop because I'm actually on mini-kit duty this month and not full kit! Last Minute Lisa panicked and pulled together a full kit - at the, yes, last minute! - only to realise that only a small kit was needed this month! But made is made so I decided to just go with it and join in on the hop - I'll still pull together a smaller kit for the 6th so make sure you come back then! 

Of course, we also have a wonderful Guest Designer too this month - Megan Blethen who can be found over at http://www.craftymeggy.com/. Thrilled to have her with us this month.

Master Forger Kelly picked out this month's inspiration kit for us this time around and we all loved the fresh colours and pretty patterns - all those gorgeous yellows, greens and blues. It's the Cocoa Daisy August 2016 kit, "Walden Pond". Find all the details here.

Cocoa Daisy, Walden Pond - Aug 2016

My kit turned out less blue and more pink - what a surprise! But the fresh colours and designs are there if you look hard! Here's Sugar (as in "Oh sugar! I made a mistake!")


I started off with the same sheet of Pinkfresh Studio paper from the original kit which gave me the bright white base.

Cocoa Daisy's kit has plenty of Paige Evans for Pink Paislee and so I added in some of her papers from this year's collection - the flowers, the ombré (instead of the red design with circles) and the water colour stripes (for the blotchy patterned one).

I used a Crate Paper circle design and then two green papers with stripes to take the place of the blue/green stripe and the hatch style pattern. An older Pink Paislee yellow - which I've had a couple of sheets of and love - stands in for the darker yellow sheet as well as the diagonal stripe. Then I added in a couple of extra sheets of Webster's Pages sequins and Amy Tangerine's stars just to reinforce the circles and the blue/green combination that appear in the original selection.

Just for fun, I included a Crate Paper sheet of vellum. I'm already in love with the mix of papers and hope for good things!


I was able to match the original kit with some Paige Evans tags that I had left over from that original collection and the Pinkfresh Studio die cuts. I fished out a large shipping tag in yellow and added in a couple of lengths of pretty twine.


I was surprised to see that the Cocoa Daisy kit had quite a lot of buttons - something I hardly ever use in my kits or on my pages. So I fished out my pot of buttons and sorted out a large selection of sizes and colours which seemed to match. Let's see how many I use.

My eye fell on a small bag full of some random bits of ribbon and twine which looked interesting so I threw that in too, just for good measure.


A Pinkfresh Studio alphabet and some word stickers were also added but I forgot some smaller alphabets so I will add those in as I need them.


I have another idea or two of what needs to go into this kit so I will see how that works and if I can, I'll share later. After all, this is a kit that normally wouldn't have been made!

All in all, for a kit that wasn't planned, I'm quite happy with it!

Here's the full hop list in case you get lost along the way.

Don't forget to share your kits and creations with us and keep checking in to see those mini kit and the challenges throughout the month.


LinkWithin

Related Posts Plugin for WordPress, Blogger...