Tuesday, 22 August 2017

August at Scrapabilly (part 1)

I haven't shared my Scrapabilly makes over here on my blog for a long time. It feels rather late to try to go back to previous months (although I might share July because that really was a gorgeous kit) but let's start with August's kit. If you follow me on Instagram, you will already have seen these but here they are for those of you who don't!

The August Kit des Monats features Fancy Pants Dream Big collection and is full of beautiful soft colours, gorgeous motifs such as clouds and soaring birds, and is just all round lovely. The kit includes 6 collection papers, some mini alphas, a pack of collection die-cuts, a cute set of postmark stamps and some puffy word elements - also from the collection. 

Here's the kit photo.


And here are my first three shares.

Layout #1 features an interesting find in Mainz that I discovered while exploring the city recently. The 50°N latitude line goes right through the city and they've marked this with a feature in the pavement. Anyone who knows me, knows that I love maps, atlas, and these markations so I was thrilled to record this. I kept this (and most of the layouts with this kit) simple to showcase both the kit contents and the photos.


It was fun to get the sewing machine out to add some detail here and there as well as the Cameo to give me some additional titling options. This is one of my favourite hand-drawn words for a title and have no doubt used it before. But it seems to go with everything!


Second up is a layout featuring some photos I took in Paris in 2007 and a story from way back in the 90s. I don't have any suitable photos from back in the day - way before digital photography and the camera constantly in your hand, and even when I didn't even have my own camera - so it was a great way to link up the more recent photos with a story from the past.


I had a lot of fun stamping and fussy cutting out one or two of the postmark elements - and this was perfect with the Paris stamp - and clustering them up with the words and die cut elements to give detail and texture to the page without a lot of bulk.


This star paper was one of my favourites in the kit. In fact the stars, the map and the cloud papers just made me super happy and I could have made a dozen items with them.


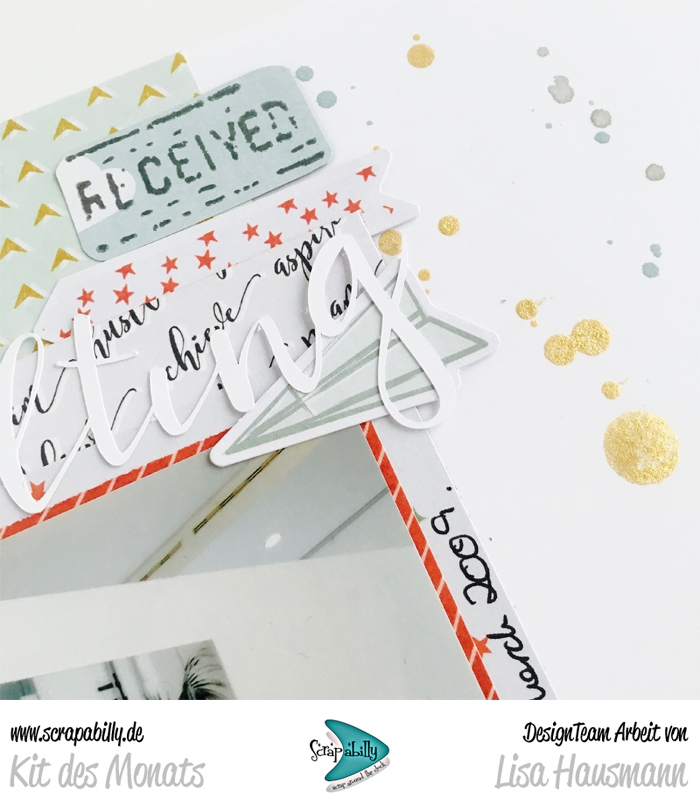
This layout layout - for today - might seem a strange one. It features a photo of a large art photo that used to hang somewhere I used to work. The guys in the photo were my students and I loved the composition of the shot. I used the photo to record a few details about my appreciation for the art the company would commission and how great this particular piece was. It's especially special as I don't work there any more and often wonder what happened to these energetic, ambitious, young men from my class.


Some of the word elements from the die-cut pack seems particularly appropriate and again, my Cameo provided some pretty cool extras!




That's it for today. If you'd like to see more, I'll be sharing the remaining two layouts from this kit in a day or two. Come back for more details!

If you are interested in your own kit, and why wouldn't you be? - you can find it over at the Scrapabilly shop here. Perfect for dreamy, travel, exploration or simply fun-filled layouts.

Friday, 18 August 2017

Counterfeit Kit Challenge - prompt #2, Scraplift Yourself

This month, I've been on main kit duty and have really enjoyed using my Restart kit. I have to confess that I've made loads of pages over the last 6 weeks or so, mostly using my Counterfeit Kits, but haven't really made the time to share them.

So today's challenge over at the Counterfeit Kit Challenge blog to scrap lift yourself is an ideal opportunity to share two layouts.

Stephanie asked us to take a page that we've made and then use that as inspiration for a new page and I picked out this one.

April 2017 kit, Chirpy lo#4

I made this layout as part of the Shimelle 25 days of scrapbooking words challenge, for which I'm still outstanding two layouts which I hope to finish next week. Anyway, this was about using a quote on your page. I found a great sunny quote by Walt Whitman which seemed perfect for this happy photo of my cute nephew and it all came together.


I had been saving the sunburst paper for a special occasion (!) but decided to be brave and just use it whole on this layout, keeping the majority of the sun burst effect visible. I wish I had a dozen more sheets of this - so, so gorgeous.

The alphas I'd included in my kit were the perfect colours to really give the quote some extra summer feeling and the tropical veneers seemed a happy addition.


I went on to make this layout.

August 2017 kit, Restart lo#6

This was made as part of the Scrap Happy mini LOAD (just a week-long challenge) Now and Then challenge. We were asked to make a layout about the musical background to a summer story. What could be more perfect than visiting the Elvis exhibition in London on a fabulously sunny, summer afternoon a few years ago with my scrappy friend who was visiting all the way from the US?


I stayed really true to the original page I'd made with the position of layers, papers, photos, journalling, title and embellishments although I changed up the single photo with four smaller ones to tell a fuller story.


The smaller photos were also ideal as they are not the best quality. The lighting in the exhibition was really low and most of our photos are super grainy. But in this 2x3 size, this is less noticeable.


When you see both layouts next to each other, you can clearly see that they have the same design and even some of the same embellishments etc. But they won't be near each other in my albums and no one will ever be the wiser. I think I need to do this more often as I loved the easier process - design decisions already made and the kit made this layout come together super quick.

Don't forget to share with us if you follow along with this challenge. You can share in these ways:

Friday, 4 August 2017

Forgeries on the Fourth


If you've come here from the Counterfeit Kit Challenge, then I'm guessing that you're interested in the printables that I've included in my kit (you can see my kit reveal here) and also some more that I've found and printed since then. I really think they are going to add some nice elements that I can cut out and use on layouts - I'm much more interested in flatter items these days after wading though some layouts in albums from back in the day which are horribly bulky!

So, I printed all these items out onto white paper - not as thick as cardstock so they should be easier to cut out - 160g. I decided to print the word confetti at two to an A4 page so that they are A5 so that they really are small words to add to pages.

So let's see what I printed (apologies for the less than perfect tinted photos):

Journalling cards, labels and tags in black and white by D-lish Scraps:

http://d-lishscraps.openstores.com.au/p/4045/Journal-Cards---PDF.html

A set of printable gift tags that I thought could be useful for the tags and banner items in the original kit by A Pair and a Spare:

http://apairandasparediy.com/2014/11/diy-printable-gift-tags-theyre-free/

On the right set of words on both in both black on white and white on black. Unfortunately, I can't find the original source but the link takes you directly to the printable page, and on the left I printed out the tiny words in English and German but there is also a sheet of just English words over at Lorelei Lee's Plan-Bar : 
https://s-media-cache-ak0.pinimg.com/originals/6e/5b/42/6e5b4228443ec4f8d755c122a3277311.jpg
https://loreleileesplanbar.blogspot.de/p/free-decoration-printables.html 

On the right four different coloured backgrounds. I can't find who originally created them but the link takes you directly to the printable page, and on the left your choice of words on white on black or black on white by Patricia at My Dandelion Dreams:

https://s-media-cache-ak0.pinimg.com/originals/c1/17/a1/c117a1c1ac3af119640881f4def4a99b.jpg
https://drive.google.com/file/d/0B0Qk9cgOGo-RbDFEOGNNdG5LeWM/view?pref=2&pli=1

 Kaitlin Shaeffer has a whole series of printable labels in all sorts of gorgeous colours on her blog here:

http://www.kaitlinsheaffer.com/downloads

And another set of labels that I don't have the original source for but the link will take you directly to the printable page:

https://s-media-cache-ak0.pinimg.com/originals/cd/65/4b/cd654b243e216ddd5b1de93adb5e6ff8.jpg 

Don't forget that the rest of the team will be back on the 6th to share their mini kits and you can share your kits and projects with us by using the Link-Up page here on the blog, posting in the Counterfeit Kit Challenge Facebook Community Group or on Instagram (find us @counterfeitchallenge and share with #counterfeitchallenge ).

Tuesday, 1 August 2017

Counterfeit Kit Challenge August kit reveal blog hop

Well, I thought I was going to do better last month and I was busy in the background for sure, but not here on the blog :-(

Sorry about that.

Will try better. The best intentions are always there even if the follow through is missing sometimes.

But hopefully you're here this morning (O. M. G.  It's August already!) to check out the Counterfeit Kit Challenge August kit and where our inspiration has taken us.

If you've arrived here from Kelly and her super sweet take on the kit, then you're on the right track and I'm at the end of the hop so if you get lost along the way you can find the full hop list at the end of the post.

And of course, I'd like to take this chance to welcome our wonderful Guest Designer Monica! So happy to have her with us this month so DO make sure you pop over to her blog to say hello.

This month, Master Forger Stephanie is at the helm and picked out this bright, happy kit from Gossamer Blue - their July 2017 kit.


July 2017 kit from Gossamer Blue


I started off by noting some of the features of the kit because it features all exclusive designs so I knew that I'd have to go with stuff that matches the feel and colours of the kit rather than the items themselves.

I saw:
  • red, white, bright green, soft yellow, navy, grey/neutral
  • diagonals, small prints, tone on tone effect, florals and outlines
  • large alpha
  • small word embellies
  • tags
  • banners
  • circles and labels
  • stamps
Right, that can't be too difficult can it?

Here's my take, Restart.

I'll be explaining the reason for the name in another post in the next few days! You'll be surprised!

As there were only five papers in the original kit plus coloured cardstock that I don't use, I decided to make two sets of six papers all along the same theme - one green and one yellow in a small print, one sheet of gold printed vellum, one sheet of navy paper with an outline design, one red with a diagonal stripe of some sort, one sheet of neutral grey with a small pattern. And there's all the b-sides too in case I need to "cheat" a little in mixing my papers.


There are a LOT of different collections and companies in here!


Then I went with the new stamps I ordered from Shimelle - these are her real life stamps that were group designed over (i)NSD. There are some tags - let's see if I can work out how to use those bigger and brighter ones.


Several sheets of small red alphas and some stickers as well as some chipboard and rubber elements from Pinkfresh Studio.


Some larger navy alphas and a sheet of work confetti that I printed off from a Pinterest link (will be sharing links on the 4th - Forgeries on the Fourth).


There's another sheet of printable labels there and just for fun, some tissue paper. I'm in LOVE with using tissue paper on my layouts since I saw Jess Clair using it on hers. Thanks Jess for inspiring me :-)


Now, I really DO have the intention of writing some more here and sharing some layouts I've made so watch out for that although I won't promise how soon that will be.

And I hope to be back on the 4th as promised to share some links for the lovely printables I've included in my kit this month. 

It's going to be a good month for crafting I think, so here's to August. 

Here's the list of hoppers today and don't forget that the rest of the team will be back on the 6th to share their mini kits. It's another full month over at the Counterfeit Kit Challenge.

You can share your kits and projects with us by using the Link-Up page here on the blog, posting in the Counterfeit Kit Challenge Facebook Community Group or on Instagram (find us @counterfeitchallenge and share with #counterfeitchallenge ).

Thursday, 6 July 2017

Counterfeit Kit Challenge July mini kit reveal

I expect that you're surprised to see another post here on the blog, making three posts in less than a week. Fluke or intention you may ask. More fluke I'm afraid. I mentioned on my Counterfeit Kit Challenge reveal on Saturday that I hadn't needed to make a full kit this month so that post was unexpected. Then the Forgeries on the Fourth post on Tuesday should have just been a share on the main blog. But as I had my usual ups and downs, I had to write a full post. 

And here we are to the scheduled post for my mini-kit reveal.

Regardless, I hope you've enjoyed the extra material and you never know, I might even continue to post more regularly, I am woefully behind on all sorts of posts - I need to share my Scrapabilly kit shares, my Simple Scrapper Creative Team layouts and also my 17 loves. Let's see...

In the meantime, my mini-kit...

Here's the original inspiration kit - Cocoa Daisy August 2016 kit, "Walden Pond". Find all the details here.


I thought that I'd like to make a kit for some cards and when my eyes fell on my overflowing scrap box, I decided it was time for action.


I attacked it with a vengeance, clearing out the papers I really didn't want and sorting those into donations for my niece or the (pink) round file. 

Then I picked out a bunch of scraps in the colours (yellow, green, blue, red) and approximate patterns (spots, small florals, spots, repeating pattern, stripes) which I thought would work well for the smaller canvas of cards.

I haven't given this kit a name because I did give one to my main kit but here it is. 


I added in a selection of mini die cuts, some left over puffy stickers and a few other random bits and pieces that caught my yes and then added in the Pinkfresh Studio alphabet that featured in the original Cocoa Daisy kit. 

As a last thought, I also added in some cut apart elements from Crate Paper although they didn't really match the original.


The forged card bases that featured in my Forgeries on the Fourth post make an appearance in my kit and were immediately finished off with a few words, some enamels (added to the kit) and die cut pieces. 

And then I just took the papers, cut them up and layered them all on top of each other to make really super simple, quick and easy cards. Some twine and doilies might also have found their way into the kit! 

Within an hour or so, I had finished 12 cards which will be so useful to have on hand.


And what about my scrap box now? I think it's fair to say that inroads have been made but much more needs to be done. My niece now has an oversized pizza box ready to receive and this is what I decided I needed to keep...


But there... in the corner... I can see the bottom of the box so I call that a success. So many pretty papers, I really have to get them used up.


If you make a mini kit this month, or are inspired to make some cards with your CKC kit, don't forget to share. We love to see what our followers are making!

LinkWithin

Related Posts Plugin for WordPress, Blogger...